Having a hard time with blurry text in windows 10? Don’t you worry, today I have one simplest solution which will resolve this issue with just one restart of your system.
Windows 10 is undoubtedly a most advanced personal computer operating system developed by Microsoft so far. It follows Windows 8.1 Metro interface but offers a much more enhanced and improved user experience.
But there are certain features and compatibility options which users wish they shouldn’t have changed. One among those features is DPI Scaling.
If you have a full HD monitor or screen with 1920 X 1080 resolution or higher then you will observe that all the icons and texts become so small that they are really hard to read unless you scale them up. Now in that case if you try to perform DPI Scaling in Windows 10 then it will usually lead to blurry fonts. And now things become more complicated as you can’t read the text anymore because everything becomes so much blurry.
So whats the solutions. Well, their’s one (might be more) and I have discussed it below.
Fix Blurry Text in Windows 10
Once you try to scale the DPI to 125% or try to set any custom DPI, you will start facing this problem.
The worst part is that it’s not just limited to system application, but it also makes your internet browsing a nightmare because now you won’t be able to read any paragraph without having a headache.
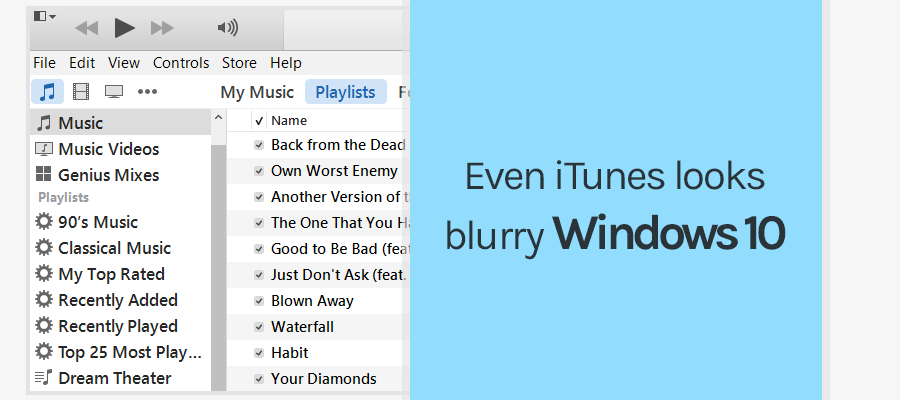
Even applications like iTunes looks blurry windows 10 which are designed to look great on 300PPI screens ( in case you don’t know I am talking about Mac systems ).
Blurry or fuzzy text are not only hard to read, but they also cause a headache when you try to concentrate too much in order to understand what’s actually written.
Solution 1: Manually fix fuzzy windows 10 fonts
This solution requires a bit of manual work, and you will have to repeat it individually for all those applications in which you see blurred text.
For example, I was facing a bit of problem with Advanced System care 10.3 pro software. Whenever I used to open it, everything including the notifications and Scan button seemed to be too much fuzzy. And so I followed the following steps, and you should also follow them one by one.
1. Right click on the application in which you are facing issues.
2. Select “Properties” from the popup menu.
3. Click on “Compatibility” tab.
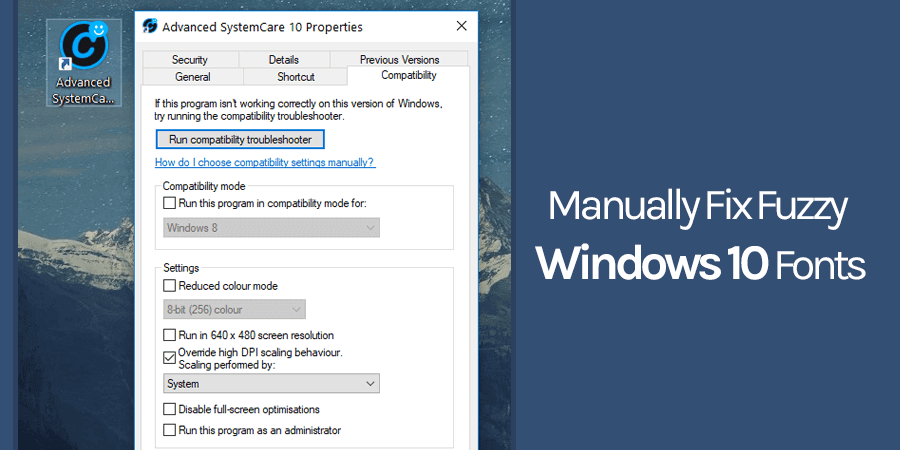
4. Select “Override high DPI scaling behavior.
5. Select “System” from the options provided in “Scaling performed by” section.
6. Click on “Apply” button and then on “OK.”
Now just restart your system, and everything should be fine for that application ( I didn’t need to restart my system though ). If you face the same problem with other application then simply repeat the steps.
Solution 2: Using XPE Windows 10 DPI Fix Application
This small but really useful application is what you need if you want to fix all sorts of font issues in your system. Once you install this application, it will attach itself in Windows boot directory and will load everything system starts. This might add few extra millisecond in your boot time but trust me its worth the wait.
1. Download XPE Windows 10 DPI Fix and install it. In case you are not able to install it, right-click on the setup file and select “Run as Administrator.”
2. From the provided options you need to select “Use Windows 8.1 DPI scaling (our fix)” option.

3. From the “DPI Scale:” drop down menu you need to select the percentage your want to choose. Most of the times users usually select 125%.
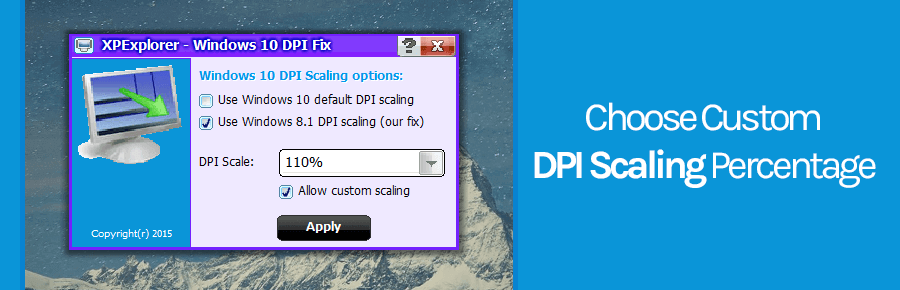
In case you want custom scaling, then you need first to select the “Allow custom scaling” option. After that from the drop-down, you can select anything between 101% to 200%.
Once you are done with all these 3 steps, just click on “Apply” button. You get now get a popup which asks you to restart the system to make the changes.
So go ahead and reboot your system. And when you will log in to your system, I am 100% sure that you will start loving your Windows 10 again.
I found a permanent way. Open display settings and enter the current scaling factor, but manually. In my case, the current one is 125%, so I entered 125 as custom scaling. After signing out and in again the blurriness was removed from all apps without their size reducing (as in the compatibility fix). No need for an extra tool. I am running Windows 10 May 2019 update on a 15\” screen 1920×1080 resolution laptop.
Great simple fix, John, works for me too
Same Win 10 config, 10 May 2019 / version 1903, fresh install.
Completely non-intuitive fix but it works very, very well. Cheers!
I thought you were pulling my leg, turns out you weren’t, what the actually crap microsoft
You are the MVP, it works
This was a fantastic fix… wow, so easy ! Thank you !
really thanks brother…
Absolutely works, no need for complicated malarkey. I appreciate it, thank you John!
LOL when the comment is more valuable than the actual article. This is the actual fix! Thanks, John.
Hi John, could you describe what you did in a more specific way? Where do you enter 125 ?
Microsoft should hire you dude, at first I was fixing it just by changing registry keys from some youtube tutorial, but this fix is funny and brilliant.
Thanks A lot dude ….!
your comment is very helpful. my problem is also solved.
Worked, thanks!
it works on win 10 (oct 2019) . Thank You!
Wow!
Of course it wont wo… Its Microsoft, it just might work. Thanks a lot!
Awesome trick!
Great!
Thanks!
Thank you so much! This helped me out more than anything else I have found.
I set it on my main monitor to be 100 with blur fixing! Awesome!!
Thanksssssssss
Thank you. That was great!!!. It did work on my 14” screen 1920×1080 resolution laptop. I have Win10. ver.1903
YOU ARE WIZARD!!
I can’t believe that worked. Thank you!
kick ass fix ! Hats off Mr. John..
Great advice, thanks a lot.
John! Thank you very much! Worked for me as well 😀
John, thank you for sharing!
Changing the scale factor manually works, who would have guessed?
Have a great evening!
Best regards,
Hi John,
What a simple yet effective fix! Thanks so much.
Didn’t believe at first but went ahead and tried.
The dialog boxes are with razor sharp text now 🙂
Holy crap, you’re a genius! Thank you so much!!!!!
What a heck… Why this solution is not popular? I tried 100 ways, and search entire internet to fix this issue, thanks!
This makes no sense, but it totally worked for me. DPI setting was on default 100%, but text looked blurry on my 2560 x 1440 display. I manually set to 100% and now text is much more sharp.
As of October 2020 this worked perfectly for me!
Thanks a lot John! What the hell BigHard?
THANK YOU SO MUCH FOR INCLUDIN THE 1920×1080 PART, YOU REALLY HELPED ME TO FIX MY PROBLEM BECAUSE I WAS SET SOMETHING ELSE.
John you absolutely wizard.
This worked. Thanks.
Thank you, John!
thank you Very much i was struggling with my 4K zenbook…. i even considered to change it to full HD ….. if there were 5 of u … the world will be a better place !!!
Yeah I dont trust like taht
Hi John,
Thank you very much, i have trying to solve this issue from last two days, you gave me a best solution, Thanks a lot.
kind regards,
Raja.
Thank for you! Second solution helped me!
works like magic, John, thanks
Thank you john
The problem is not so much blurry text but skinny text that older people cannot read. Microsoft has introduced skeleton text. When it initially takes over your PC text goes so skinny that the black text writing gets fine white background dots into it making the text blend into the the white back ground. The text looks jagged and feint.
To make make the text look solid again you will have to change the default text to one that is larger and darker.
https://www.windowscentral.com/how-change-default-system-font-windows-10
http://www.techieleaf.net/how-to-change-default-system-fonts-in-windows-10/
Very good John, excellent. no need for extra boot apps
That was brilliant John! It worked for me too. I’ve been wrestling with the blurry fonts for more than a week. Thank you so much!
It’s April and still working. You have solved the unsolved problem of Windows. I think you’d better put it on your CV as an achievement! Thanks John!
This makes no sense, but it totally worked for me. DPI setting was on default 100%, but text looked blurry on my 2560 x 1440 display. I manually set to 100% and now text is much more sharp.