Favicon is a small image that appears just beside the title of the website in the web browser tab. They are one of the essential elements of any website’s design as they help to build authority and trust among your website readers and visitors. But even then most of the novice bloggers and sometimes even professionals forget about this essential element.
Favicon does only help to improve your overall website’s appearance in front of your customer or visitor but it also helps to improve usability. Let’s say that your customer has dozens of tabs with different URLs opened in his browser. Now just guess how will he be able to identify which one is your website. Well if you have a properly designed and a brandable favicon, then your customer will definitely be able to identify your site.
According to World Wide Web Consortium Favicon is a Graphical image that is associated with a website. The most suitable formats are PNG, GIF or ICO And it is recommended that the image uses Either 8-bit power 24-bit colors.
Now the question is how to add a favicon to the WordPress website?
Well, in order to help you in this task I have created this tutorial. This tutorial is divided into three different subsections and each subsection consist of few simple steps which you need to follow.
Contents
Step 1: Creating a favicon in Photoshop
Our first and foremost step is to create a favicon so that we can upload it to our WordPress website. To do so I will use photoshop since I have Adobe creative suit subscription. In case you don’t have access to Photoshop then you can try GIMP which is one of the best open source graphic designing suite.
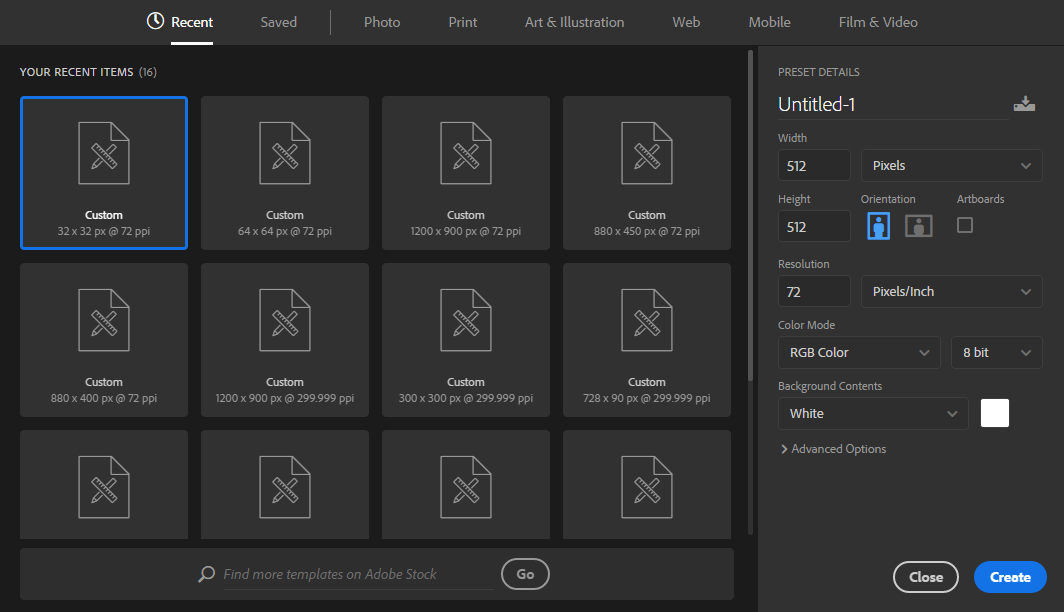
Now once you have opened Photoshop you need to create a new file and under the weight and height section, you have to enter 512 and 512 value. And then you have to click on the blue create button.

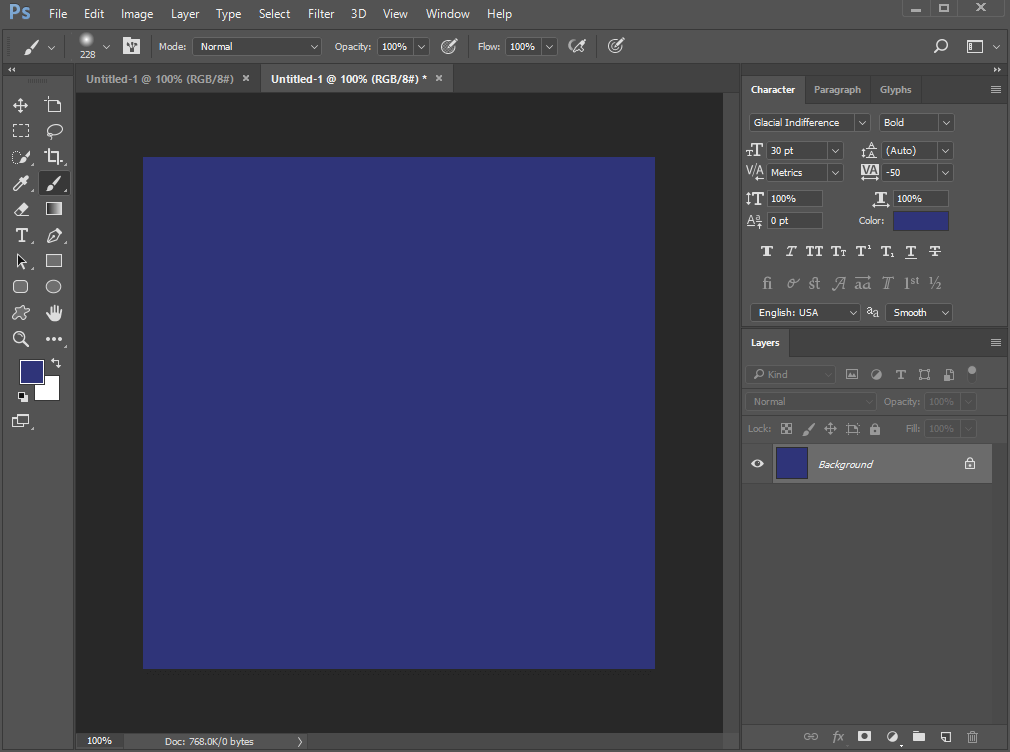
Now a new tab will open with one a small 512 x 5122 pixels white box in the center of the screen. From the right-hand side panel, you need to click on the background layer. From the left-hand side of the panel you need to select the Brush tool, then the color of your choice and have to paint that color on that 512 x 512 pixels white box.

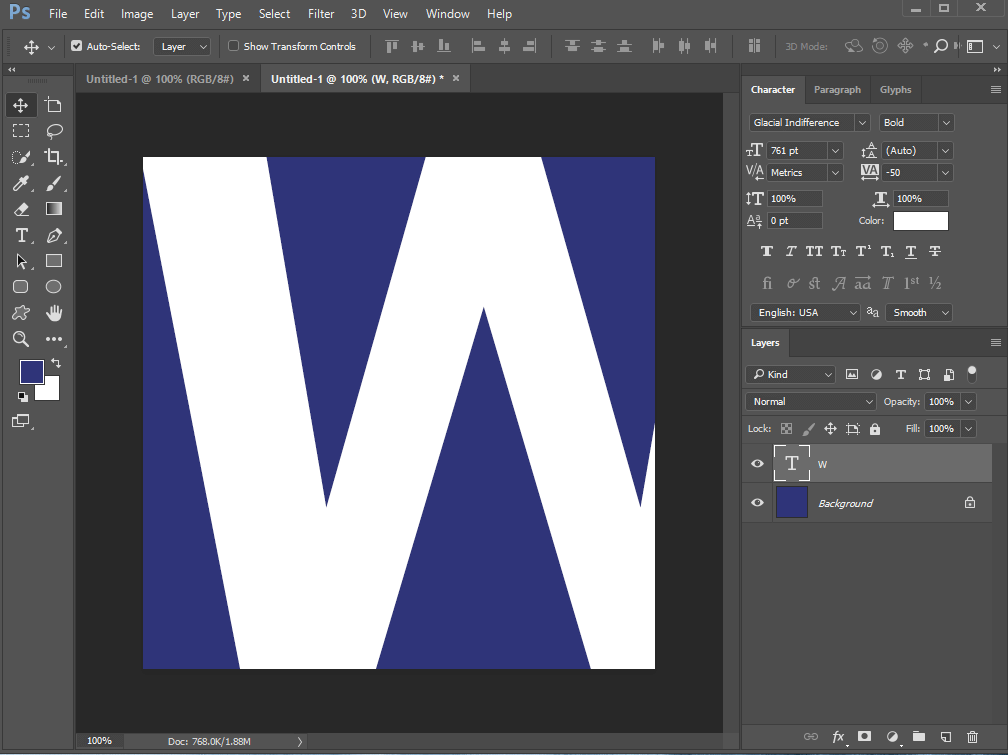
Once you’re done with that now you need to select the typography tool from the left side panel and have to click on the box you just colored. Now when it comes to creating the favicon I usually type the initials of my website. For example, the website name is WPVKP and so I will type W which is the initial character of my site.

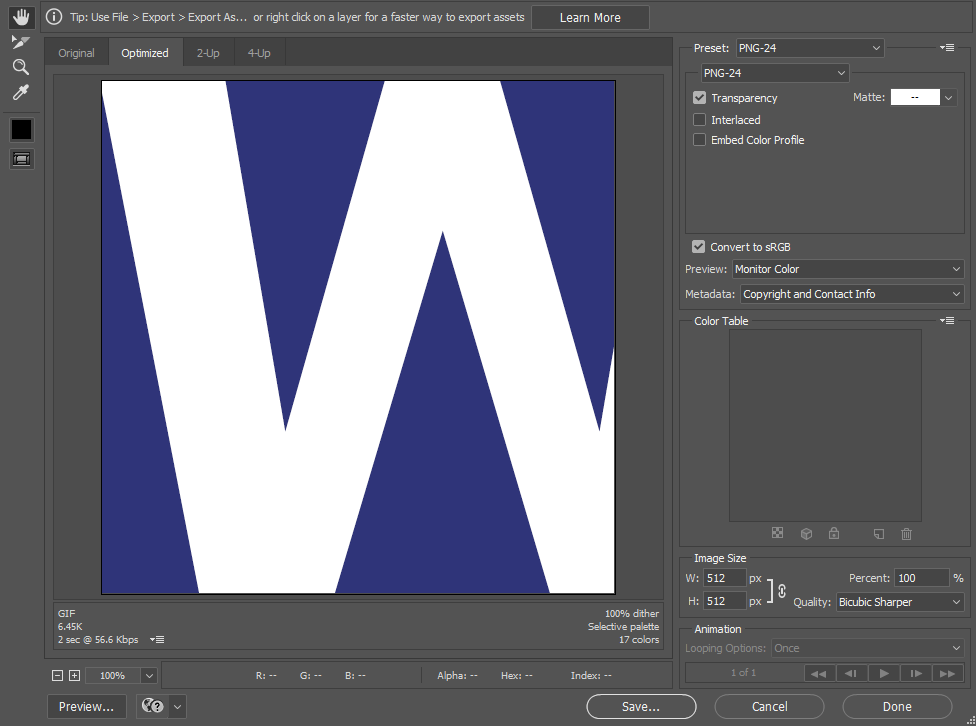
Once you are done with the designing and typing you need to press the ctrl+alt+shift button on your keyboard in order to open save for Web options panel. From the present section, you need to select PNG 24 option and then you need to click on the save button. A new Windows panel will open asking you to provide the name in order to save the file. Just typing favicon and save your file.

Congratulations your very first step is now completed.
Step 2: Using the customizer to add favicon to wordpress website
Since version 4.4 WordPress comes with an integrated support for site icon. One of the biggest advantages of using the integrated option is that it makes your favicon compatible with multiple platforms without manually creating them individually for each of them. Once you upload your 512 X 512 site icon, WordPress will automatically generate various different sizes of site icons and will then link them in your site’s <head> section. Currently, the supported platforms are Microsoft Windows, Google’s Android, Apple’s Mac and Apple’s iOS operating system.
Coming back to the point, if you have followed each and every single instruction provided in step 1 then you must have already created your favicon. And now it’s time to test your site icon And in order to do so you will need to follow the steps listed below:
- Log into your WordPress website administration panel.
- Now put your cursor on “Appearance” Menu link which you will be able to find on the left-hand side of your site’s administration panel.
- From the on hover menu, you need to click on the customise link.
- You will now be redirected to a new page.
- Once the page has loaded completely You need to click on the “Site Identity” link.
- Now under the site icon section, you Have to click on add image button.
- Navigate to the image you created in the first step and click on the select button. That’s all.
Congratulations now you have successfully added site icon to your WordPress website.
Step 3: Workaround for websites which are using WordPress 4.3 or lower version
If you are reading this section then most probably your website is using WordPress 4.3 or lower version. The very first thing which I would like to tell you is, you need to update your website. I’m not requesting you to do this because the latest versions have better features, offers better performance and is compatible with PHP7, but I’m saying this because I am much more concerned about your site security.
So according to me, you are very first step is to update your site as soon as possible.
But I won’t blame you if you are forced to stick with the older version because of some plugins or themes compatibility issues.
Coming back to the point the simplest solution for adding a favicon to your website is installing an open source plugin named Heroic Favicon Generator.
Once you have installed this plugin you will get a new option named “Heroic Favicon Generator” under the “Settings” options. All you need to do is to navigate to this options page and then upload the site icon you created in the first step. This plugin will automatically generate Favicon in 12 different sizes. Furthermore to give you, even more, control you can individually customise favicon for each and every individual device supported by this plugin.
Solutions for some common issues
Most of the time after uploading a new favicon to your site you are not able to see them on the tab of the browser.
The reason behind this is very simple and that is cache. It is extremely necessary that you clear your website’s cache after performing any changes to your site’s design. If you are using any proxy cache engines, for example, FastCGI or anything similar then you also need to flush their cache.
If you are using nginx FastCGI on your server then you can flush it’s cache using the following command: systemctl reload nginx. Just make sure that your logged-in as root or you can try this command: sudo systemctl reload nginx.
Conclusion
As you have seen in this tutorial it is really easy to create a favicon and add it to the website. The maximum time required to execute every step in this tutorial is less than 20 minutes.
In case you are uncomfortable with creating the site icon on your own you can take help of some free online tools like favicomatic and favikon. Both of these sites are extremely easy to use and allows you to perform basic manipulation on the images. Furthermore, they will help you to create favicon In almost every possible size thus offering you maximum compatibility with different devices and platforms.

Leave a Reply