Linode is one of my favorite VPS hosting providers. They provide powerful virtual private servers at really cheap prices. How cheap? Imagine a server with 1GB RAM and 20GB hard disk space at only $5 per month. That is probably cheaper than a shared hosting account in most places. And with a VPS hosting, you don’t have to share that resources with other shared hosting customers. It is dedicated to your server and yours alone.
Advantage:
- Powerful servers
- Low prices
Disadvantage:
- DIY service requires really high knowledge of server management and administrations
But I understand why many WordPress users are running away from VPS and cloud hosting.
VPS and cloud hosting is basically a DIY-service. Just like going to the coin operated laundry service where you need to load your clothes yourself, unload and then load it into the dryer, and then bring your own detergent, VPS hosting almost like that. You are expected to set up and configure the server yourself.
The customer support does not help you with that, except for maybe for some manuals and articles hosted in their knowledge base.
The long story, you would need to do all these yourself:
- Install Apache web server
- Install PHP
- Configure PHP modules & dependencies
- Install MySQL
- Configure your domain name in Apache web server
- Create MySQL database and users
- And in the future monitor the server yourself for up time, performance and other issues
And each of those steps may take hours if you don’t know what you are doing. And you would need to know a lot command-line instructions for Linux to be able to do that.
But what if I can show you a method where you can get the power of Linode VPS hosting without having to go through all of the technical nightmare I said above?
Contents
Install WordPress On Linode VPS using RunCloud.io
So this is where RunCloud.io comes in. RunCloud.io has a free account level for you start with. Otherwise, it is just $10 per month. A well worth investment when you have two or more servers on Linode (or other VPS hosting).
Register for a RunCloud.io account
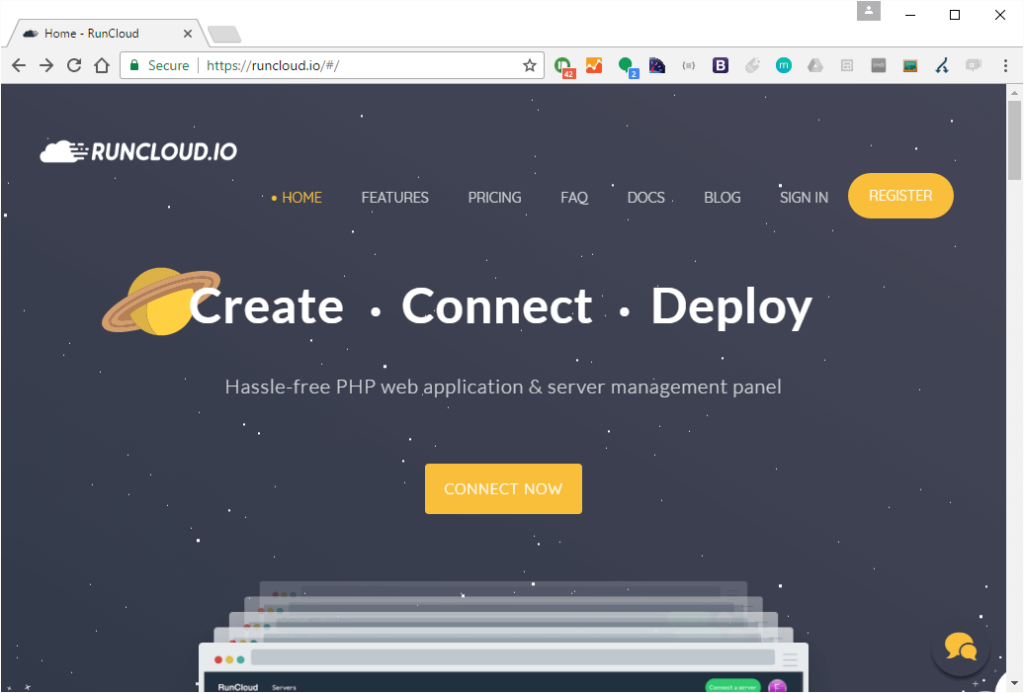
This is really easy. Just head over to https://runcloud.io and click on the yellow button on the top right which writes “Register”.
Or you can also head on over to https://manage.runcloud.io/auth/login
Next just choose how you would like to register. You can create an account with RunClound using your Github, Digital Ocean or Google (Gmail) account.
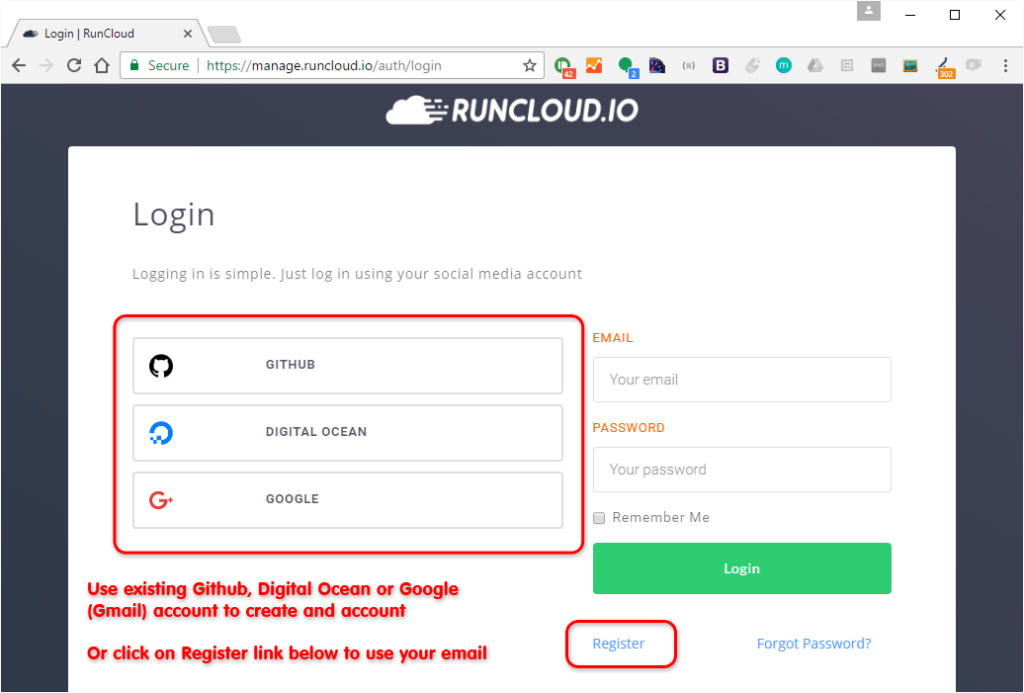
Or you can simply use your email address if you don’t want to, or you don’t have any of those accounts available. You can also just head over to the link below.
https://manage.runcloud.io/auth/register
If you are using your email address, then just complete and submit the form.
You will be getting a verification email from RunCloud, just to make sure that you have a valid working email. Head on to your inbox, open up that email and click on the link to activate your account. The email should have a subject line “Welcome to RunCloud”.
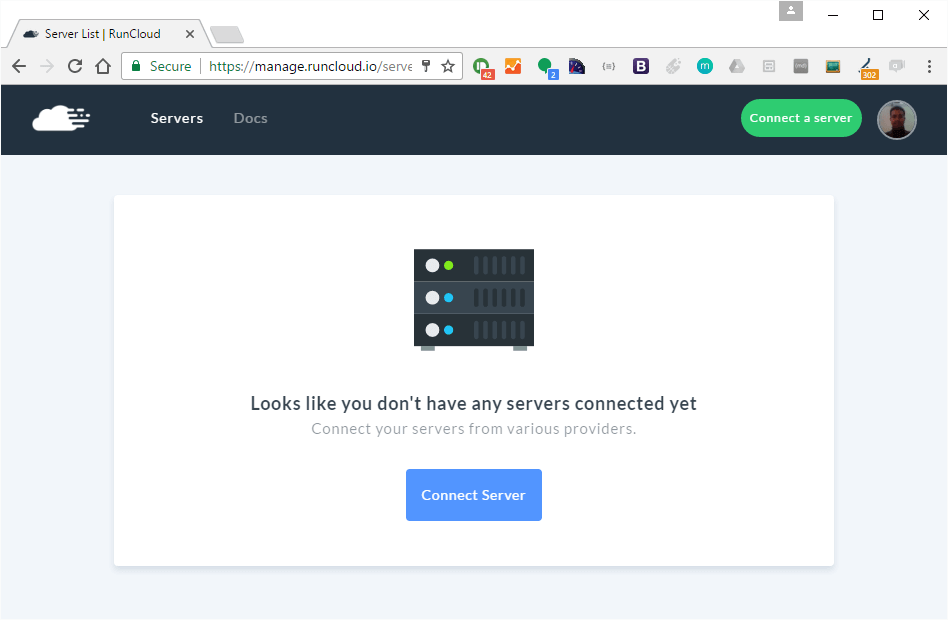
Once your account is verified, you can login to RunCloud and see how it is like inside.
Yes, you don’t have a server connected yet. We will connect a server later, once we have our server deployed in Linode
Register for a Linode account
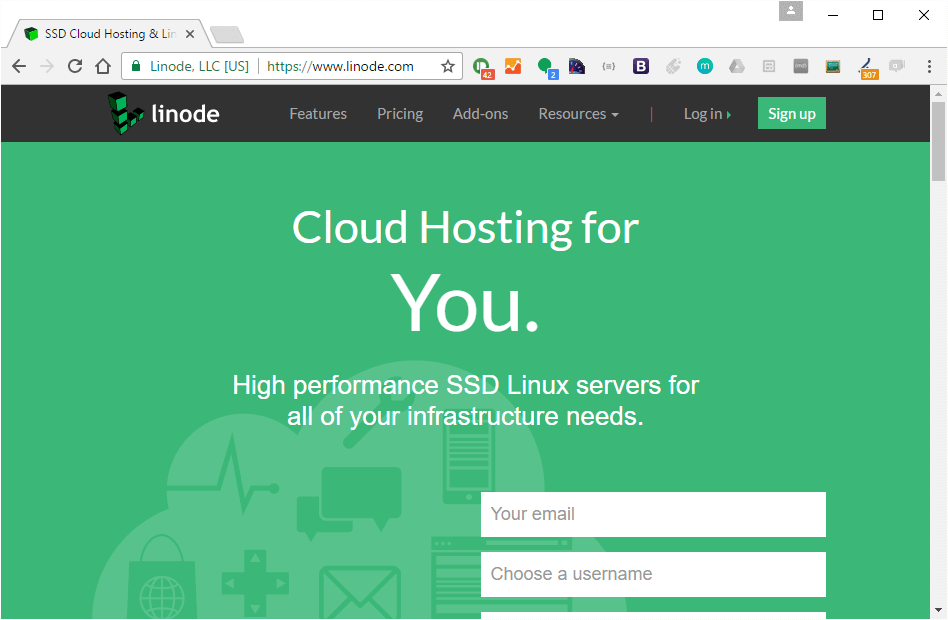
Registering an account with Linode is pretty easy. You can sign up from the homepage itself, or from the Sign Up page.
You will need to verify your email address to activate your account, just like with RunCloud. So head on to your inbox and look for that email.
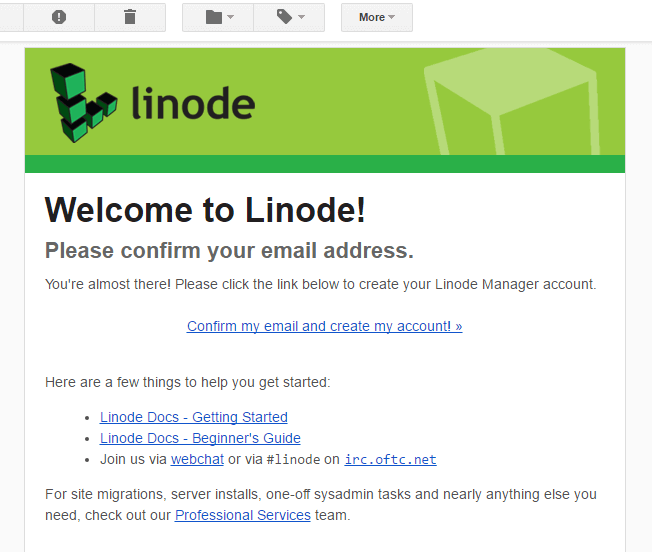
Over at Linode, you will need to complete your signup. Click on the button that writes “OK! Let’s complete my signup >”.
Here, you will need to complete your details, add a credit card and make preload your account with your initial credit. Make sure you check the “Agree” checkbox and then click “Add Credit”.
Create a server (linode) in Linode (remember root account password)
Once you Linode account is all set up, it is time to create your first server. Click on the “Linodes” menu on the top menu bar. You will see a list of servers to choose from.
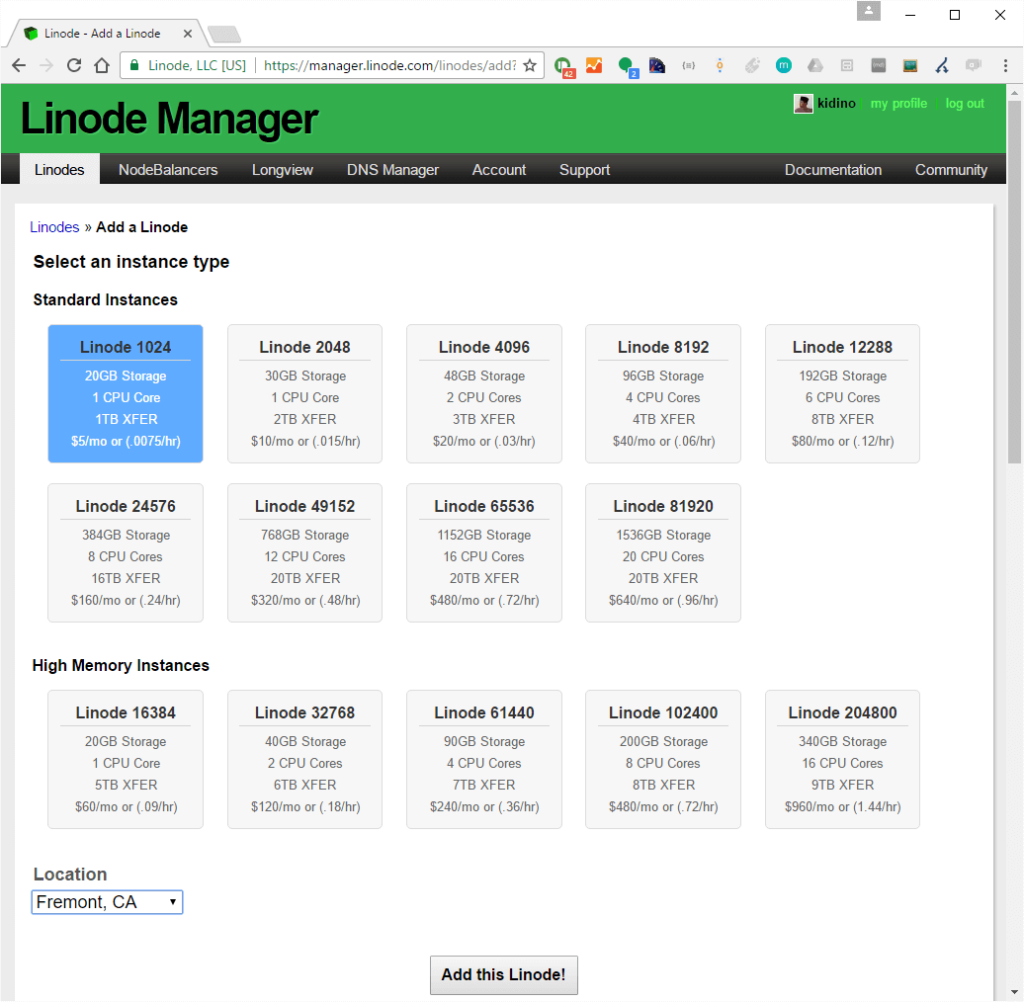
Unless you know what you are doing, I suggest that you get the Linode 1024 as your first server. You can select which datacenter you would want your server to be in. When you have made your decision, just click on the “Add this Linode!” button.
Below you will see that you have two servers. I already have a server. But on is labeled with “Brand New”. That is the server you just created.
Pay attention to the IP Address for the this server. You may want to jot that down somewhere because we will be using it later.
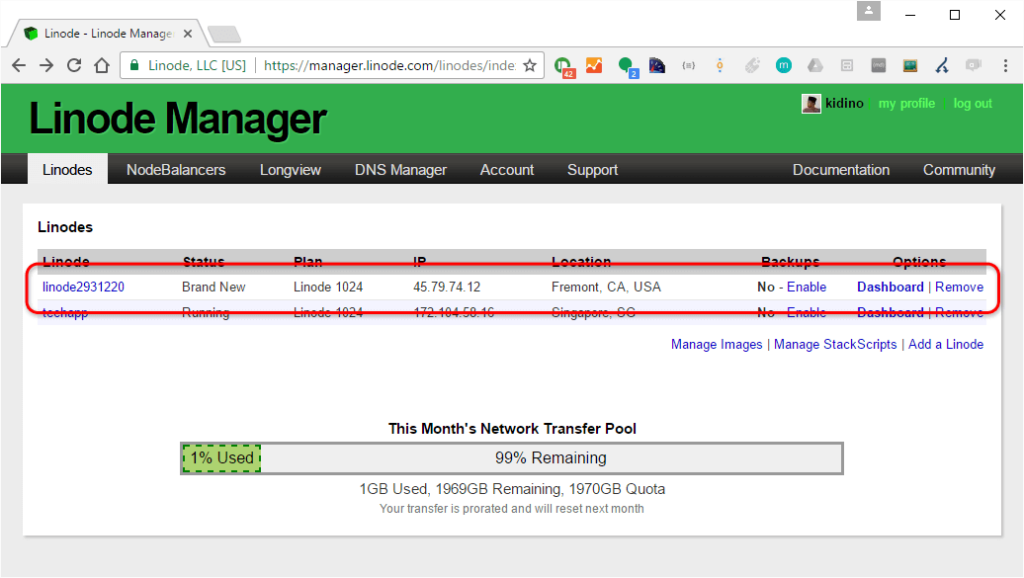
Click on the “Dashboard” link or on the name to manage your server.
Currently your server has no operating system. It is just like a brand new empty server. You need to install an operating system on the server. To do that, click on “Deploy an Image”.
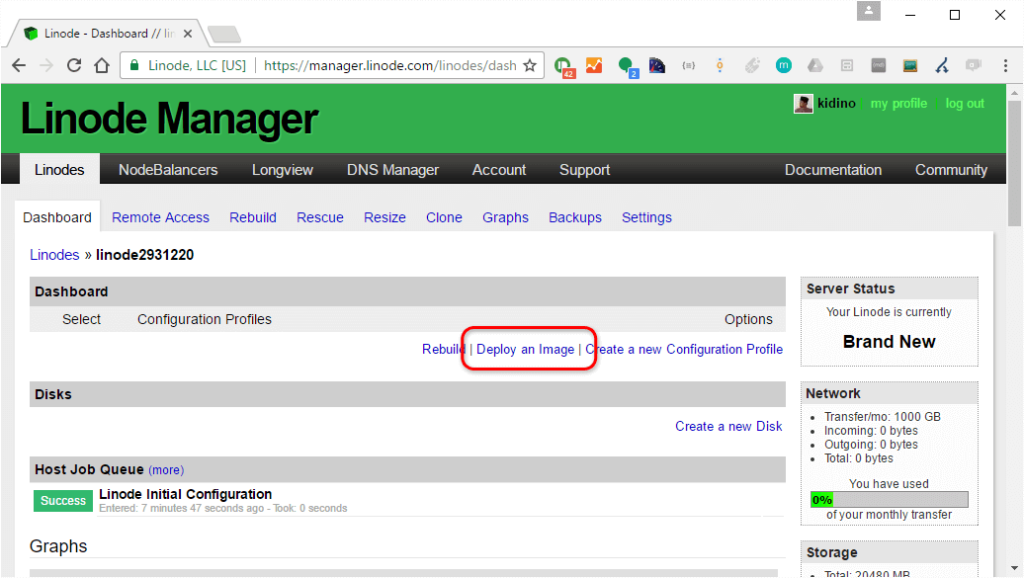
When selecting an Image (or operating system), because we will be connecting this server to RunCloud later, make sure you choose “Ubuntu 16.04 LTS”.
I leave Deployment Disk Size to the default value, making the operating system utilizes the maximum space it can. As for Swap Disk, I like to use the maximum option, which is 512MB.
Now choose a strong and difficult password for your root account. In case you are new to Linux, the root account (the username is root) is the master user account for a Linux server. We will probably use this just once. But make sure it is something impossible to guess and make a note of that somewhere. If you lose it, there is no way to retrieve that again.
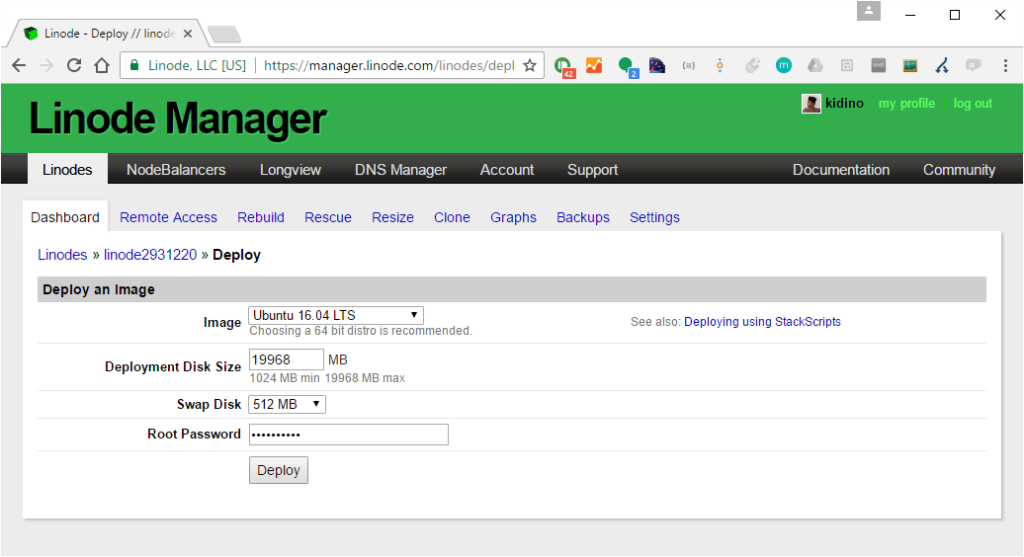
Once you got all that, just click the “Deploy” button.
Be sure you keep note of your root account password. We will be using it again later. Now you need to turn on your server. Just click on the “Boot” button.
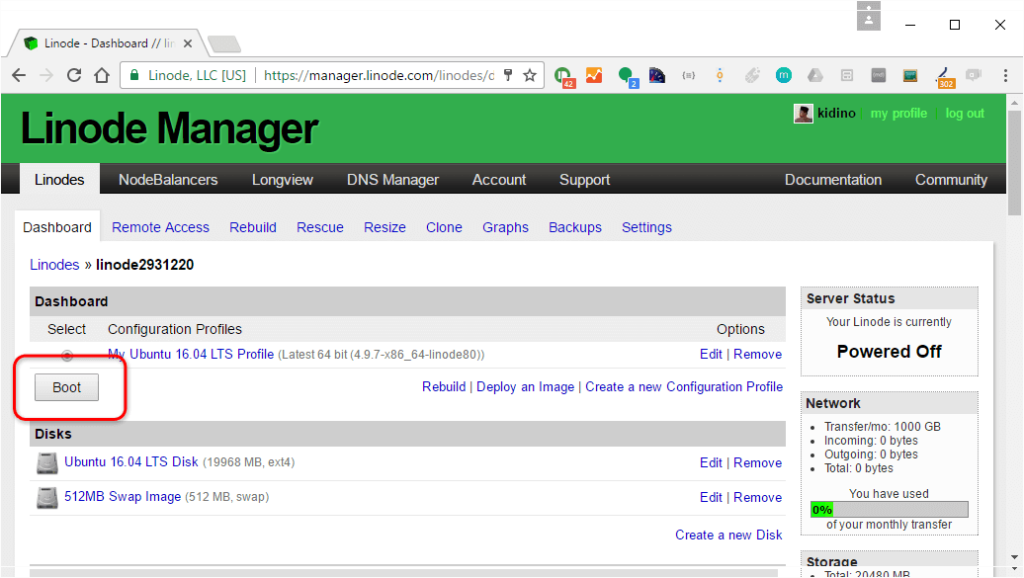
Once the server is up and running, can start to connect to it with RunCloud. We will be heading back to RunCloud.io now.
Create a server connection in RunCloud (get install command)
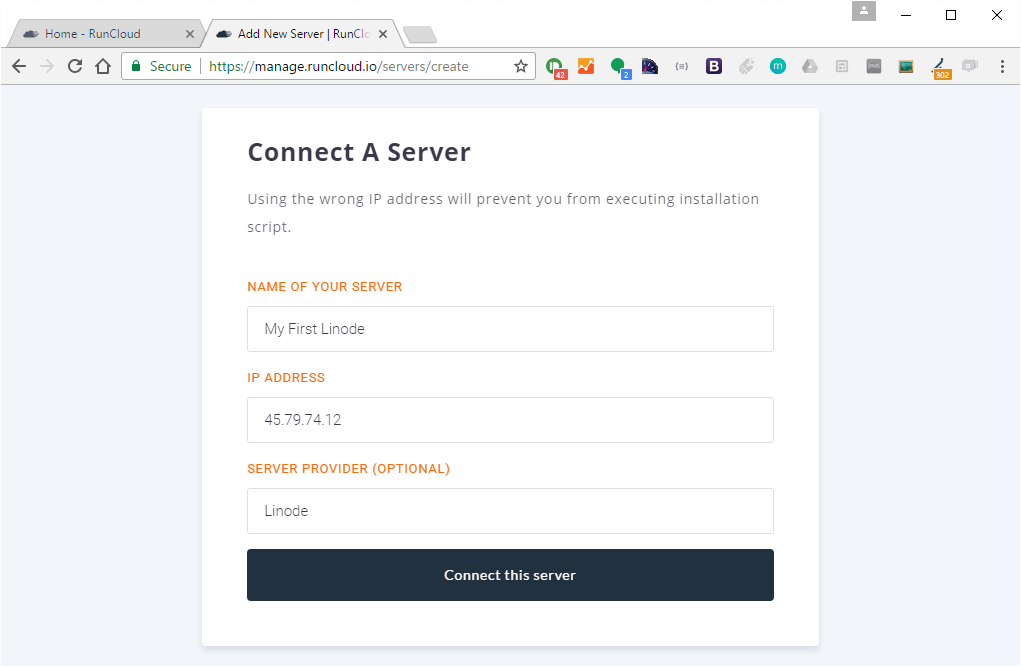
Login to your RunCloud.io account and click on the “Connect Server” button. Once there, just enter the details of your Server. You are free to enter any other details, but the IP address has to be correct just like how you see it Linode.com previously.

You are now presented with the connect command that you need to enter in your server. For now just copy this command somewhere. We will be using it later.
Paste the RunCloud connect command in Linode’s Lish Console (let it run for a few minutes)
You can run the command that you get from RunCloud using SSH. But since Linode has a tool to easily connect to your server, we will be using that.
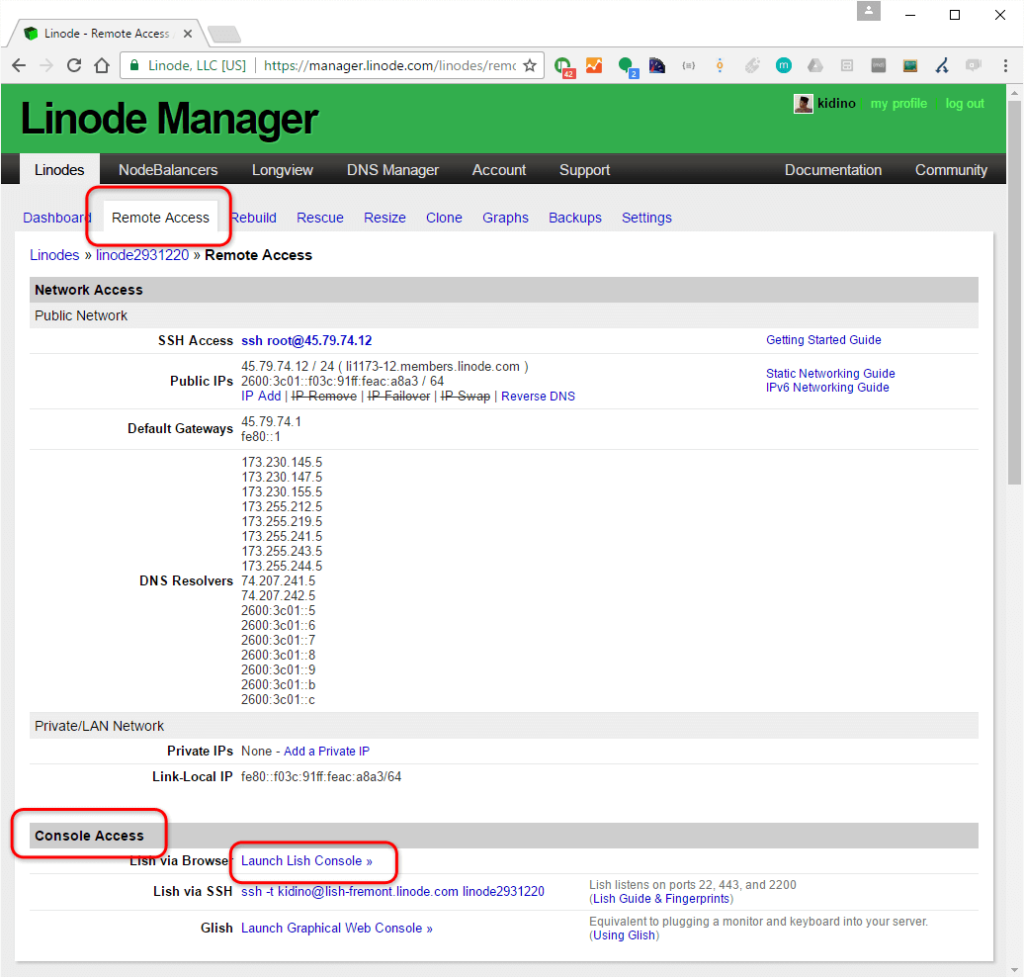
Now let’s get back to Linode.com and back to managing your server. Now click on the “Remote Access” tab menu. Scroll down, and you will see the “Console Access” group. In that group, there is a link that writes, “Launch List Console”.
Click on the “Launch Lish Console” link. A new window should pop-up. Here just type in:
root<enter>
{your root password}<enter>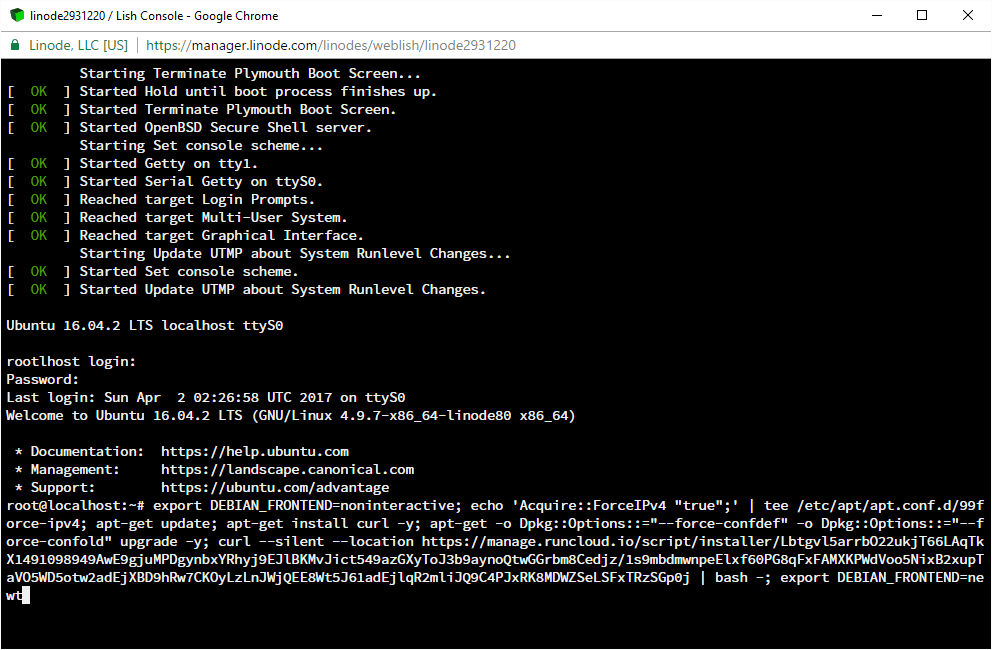
Now, remember the command from RunCloud? Just copy that and hit enter.
Now RunCloud is helping you install all the necessary applications and services like Apache for your web server, MariaDB for your database, PHP and all other dependencies. If you put the Lish Console and your RunCloud dashboard next to each other, you will probably see something like this.
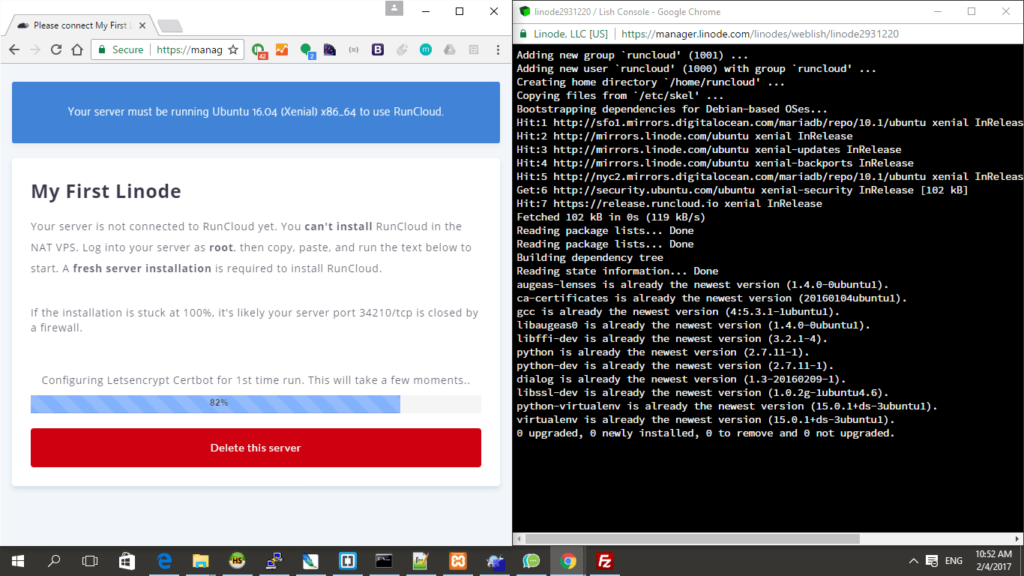
When everything is complete, you will see the following in the Lish Console. Copy that details that you see and keep it safe.
RunCloud connection is complete! (now we can manage everything from RunCloud)
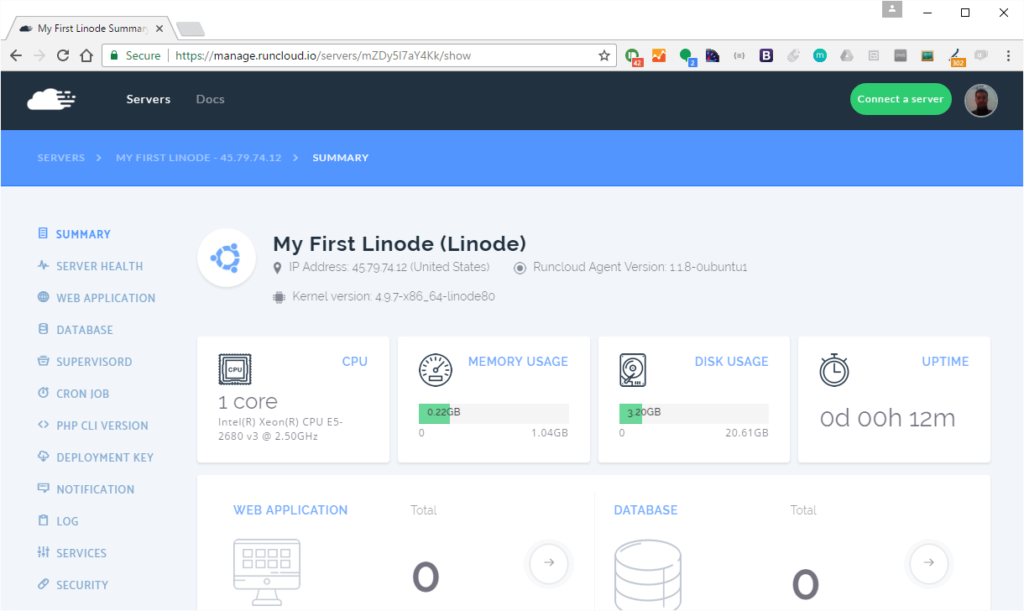
At this point, your server is connected to RunCloud.io. You don’t really need to manage things with Lish Console anymore, or Linode. You can manage things from RunCloud.
If you look at the menu on the left, there are a lot of things that you can do. For now, let’s just focus on getting WordPress installed and running.
Creating a web application in RunCloud
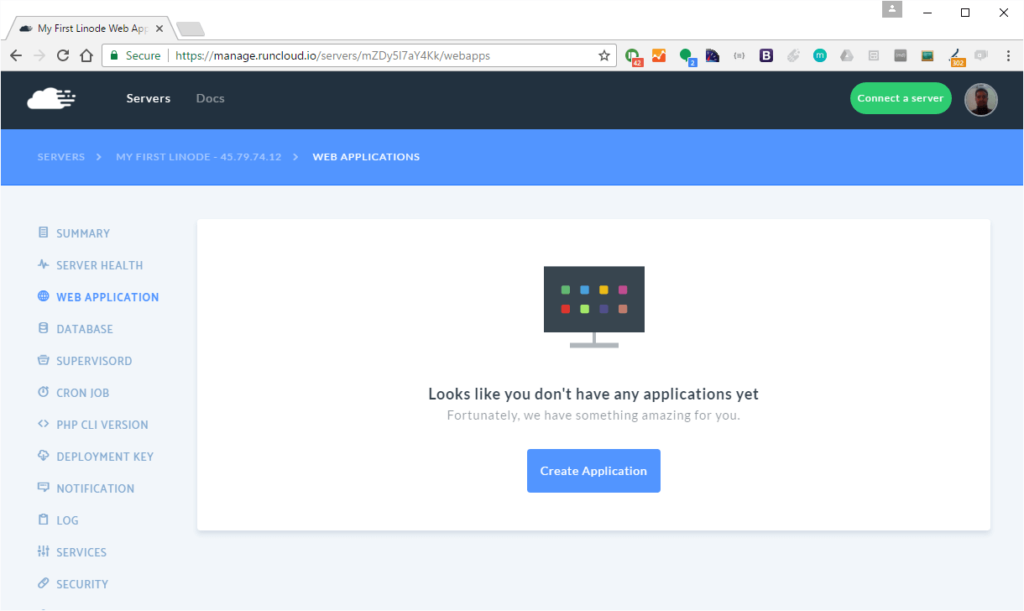
To start installing WordPress, you need to create a Web Application first. Now click on the “Web Application” menu on the left, and then click on the “Create Application” button.
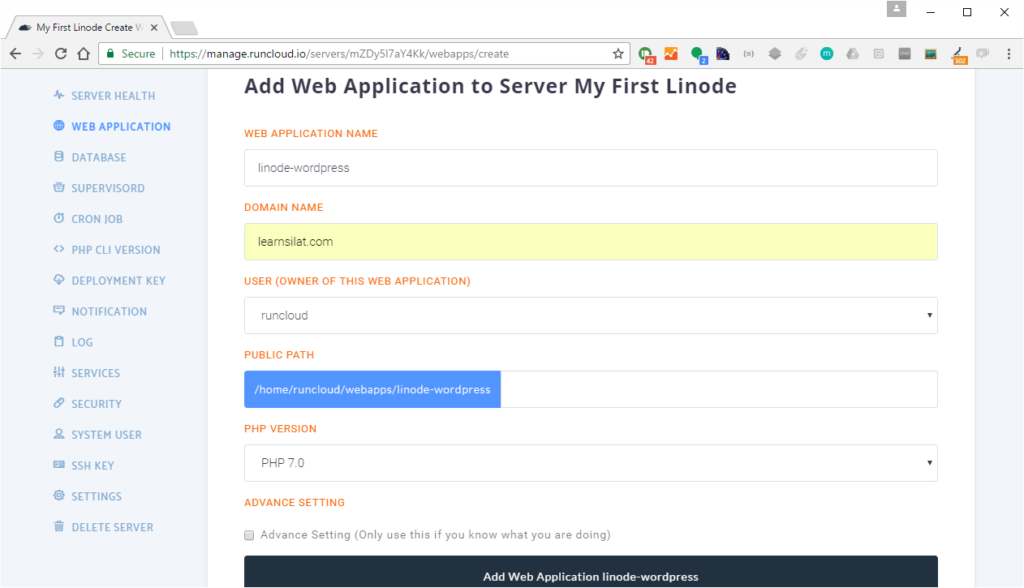
Now enter details of your Web Application. If you already have a domain for it, you can enter it here. If not, you can enter it later. For now, I choose PHP 7.0 for my PHP Version.
Once ready, just click on the big “Add Web Application” button at the bottom.
Adding a domain name in your web application
When you have a web application, and drilling down into that web application, you can do a lot more. In case you did not set a domain name for your web application later, this is where you can add them to.
The basic idea is this:
- One server can have multiple web applications
- One web application can have multiple domain names
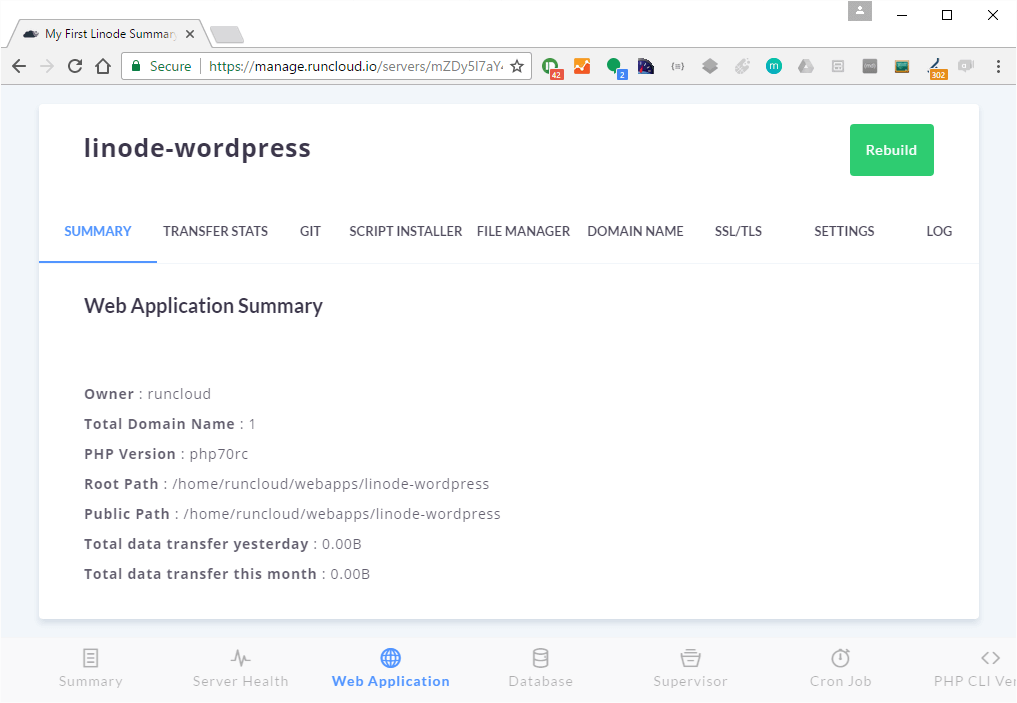
Why multiple domain names per web applications? Many reasons. But one use case is when you want to change the domain name of your WordPress installation. You can add the second domain name while having the first domain name live and running. When the second domain name is fully propagated at DNS, you can login to your WordPress and update the base URL.
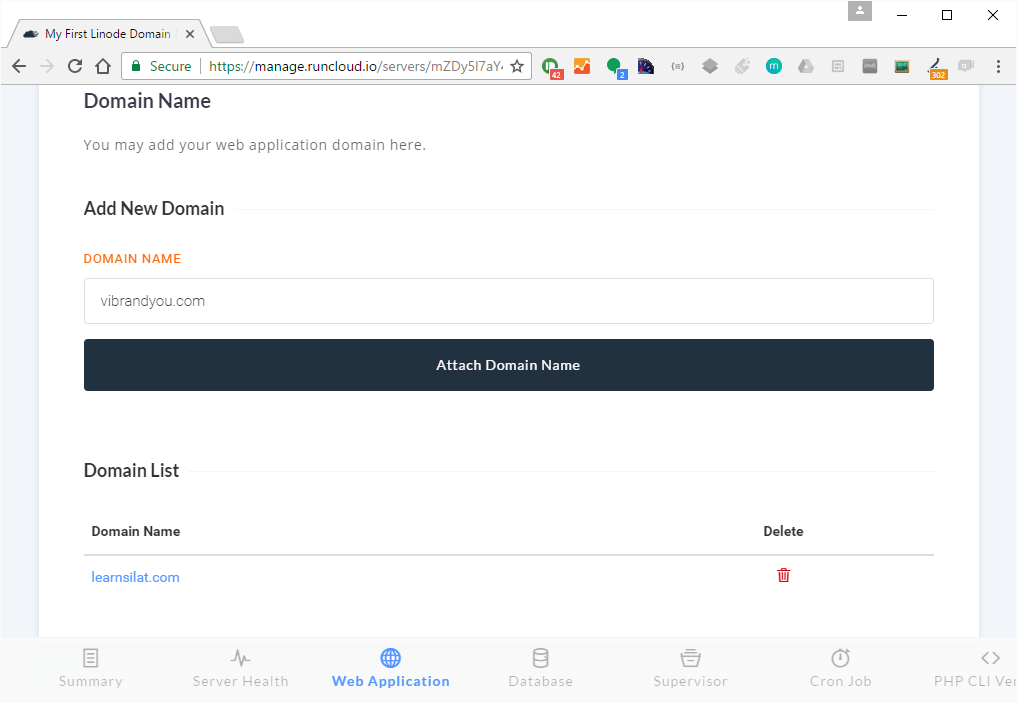
Normally a website works with and without the “www” sub-domain. If you added the “domainname.com”, be sure to also add “www.domainname.com” in your domain name list.
By now, even though you have added your domain name to your server (via RunCloud), we still have to set the DNS for domains. We will do this next.
Setting the DNS for your domain (GoDaddy)
A domain name cannot work without a DNS service. Normally your web hosting provider will provide the DNS servers, and you would need to update this with your domain registrar, like GoDaddy for example.
But fortunately, domain registrar company like GoDaddy has DNS service built in. So were are going to do that now.
Instructions for NameCheap is available in the next session.
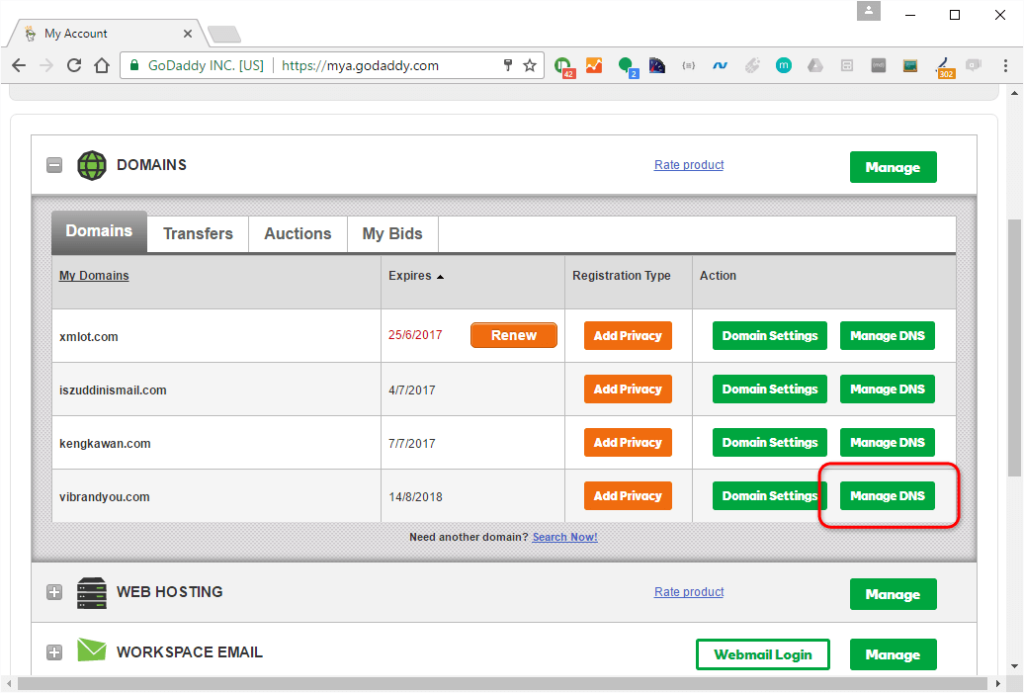
After logging in at GoDaddy, expand your domain name section and click on “Manage DNS” button.
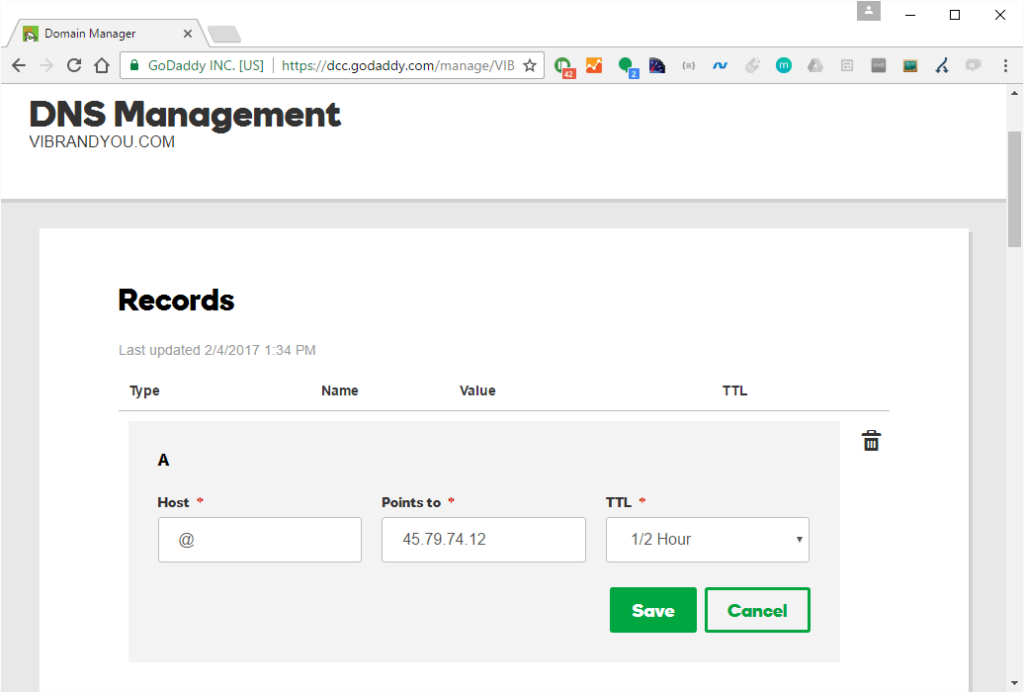
If there is already an A record, you can edit that. If you not, you need to create a new A record. Update the values as below:
Host: @
 Points to: {your server IP address}
 TTL: 1/2 hour
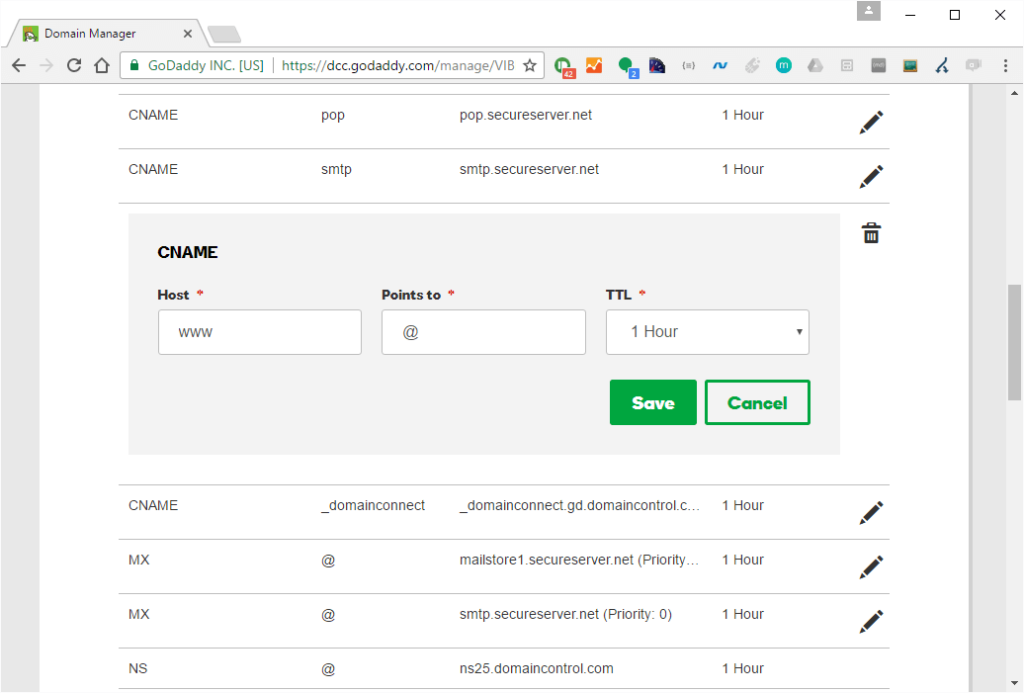
Normally a website works with the top level domain name and with the “www” sub-domain. For the “www” we need to edit or create a CNAME record. If there is already a CNAME record, edit that. If not create one.
Enter the following details for your www CNAME record:
Host: www
 Points to: @
 TTL: 1 Hour
We are close now. If you buy your domain names from NameCheap instead, you can try the following instructions.
Setting the DNS for your domain (NameCheap)
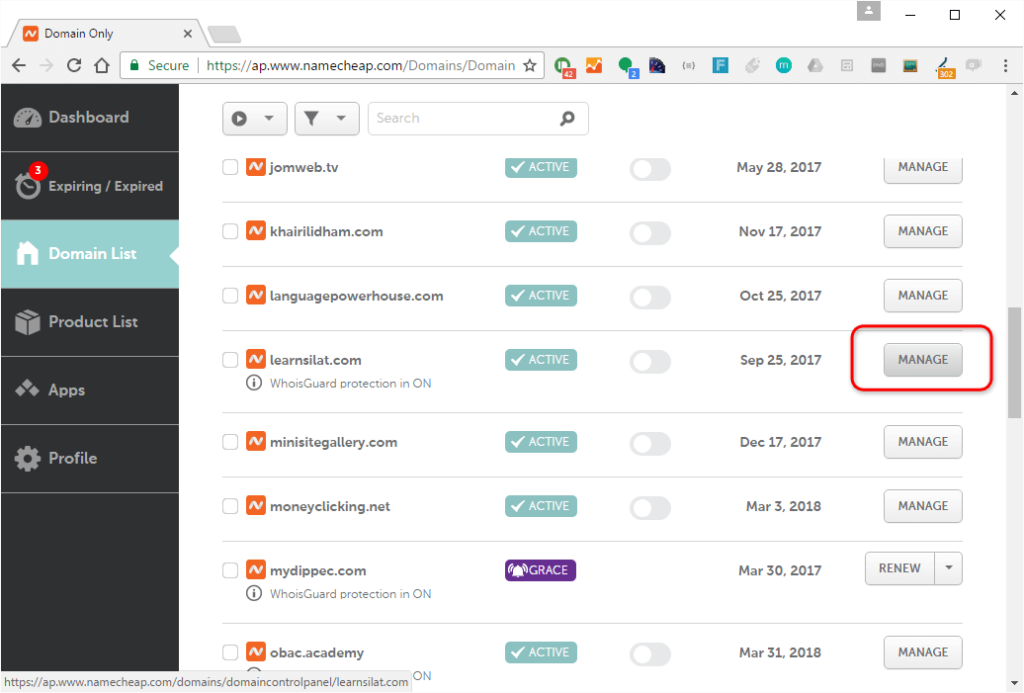
After logging in to your NameCheap dashboard, click on “Domain List” from the left sidebar menu.
From your Domain List, you can click on the “Manage” button.
Then click on the “Advanced DNS” menu for this particular domain name.
Here you just need to update the DNS like the following. If there is already an A Record, you need to edit that. If not, just create a new one. Then add a CNAME record for your “www” sub-domain. Your edits should give your something like this.
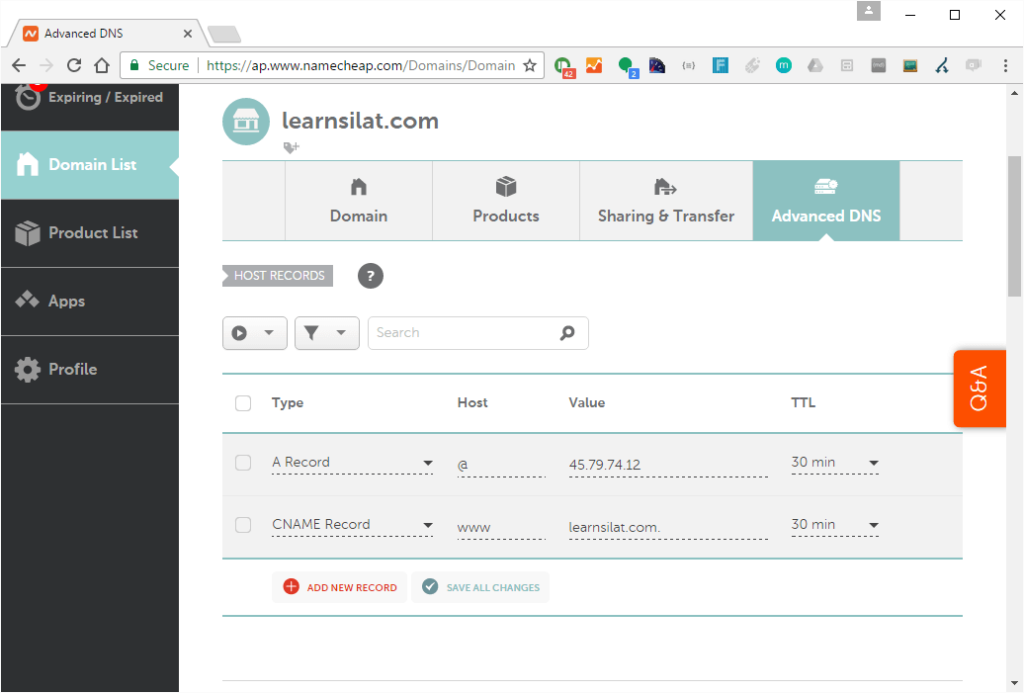
Don’t forget to click on the “Save All Changes” button.
To summarize, you want to make sure that you have at least these two records:
A - @ - {IP address} - 30 min
 CNAME - www - {your domain name} - 30 minute
When the domain has propagated properly, you should at least have the following when you type in your domain name in the browser.
Create MySQL database and user for WordPress
Before we can install WordPress, we need to prepare the database and database user for WordPress. This is really easy with RunCloud. After selecting your server, click on “Database” on the left side menu and then click on “Create Database”.
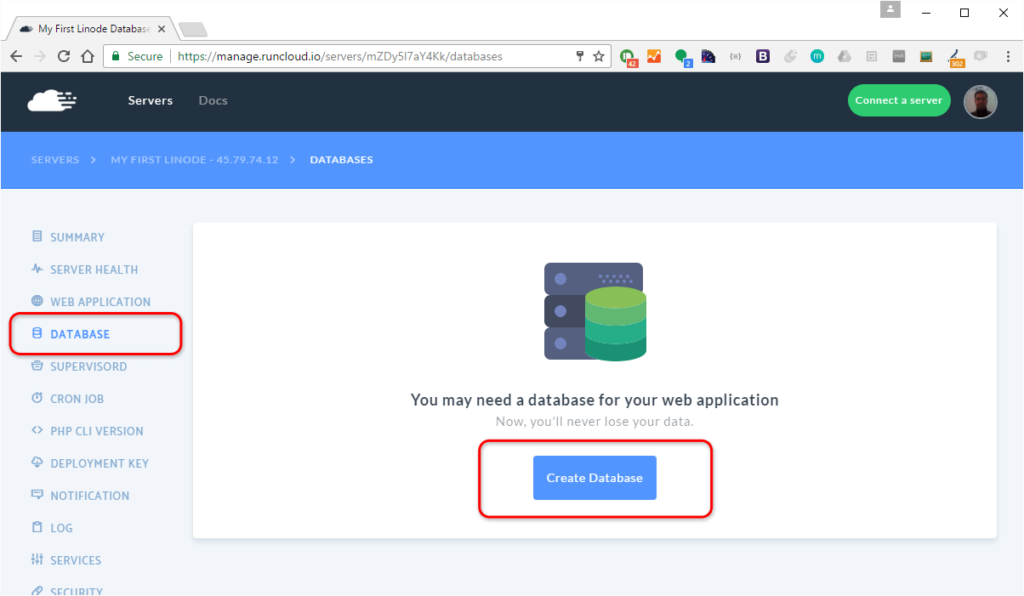
Enter the name for your database. Click on “Add New Database” button.
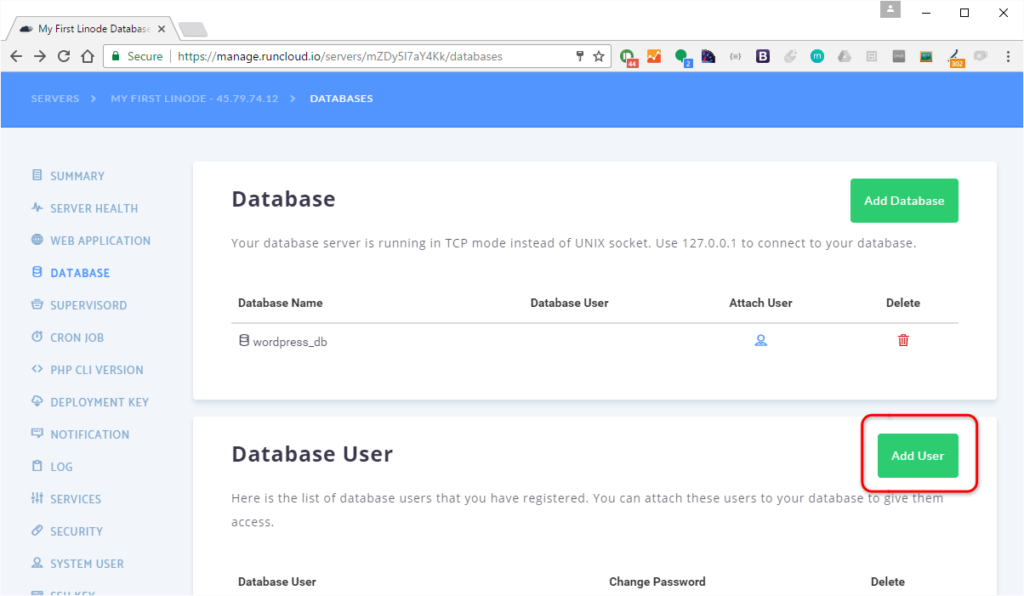
Now you need to create a user for your database. Click on the “Add User” button.
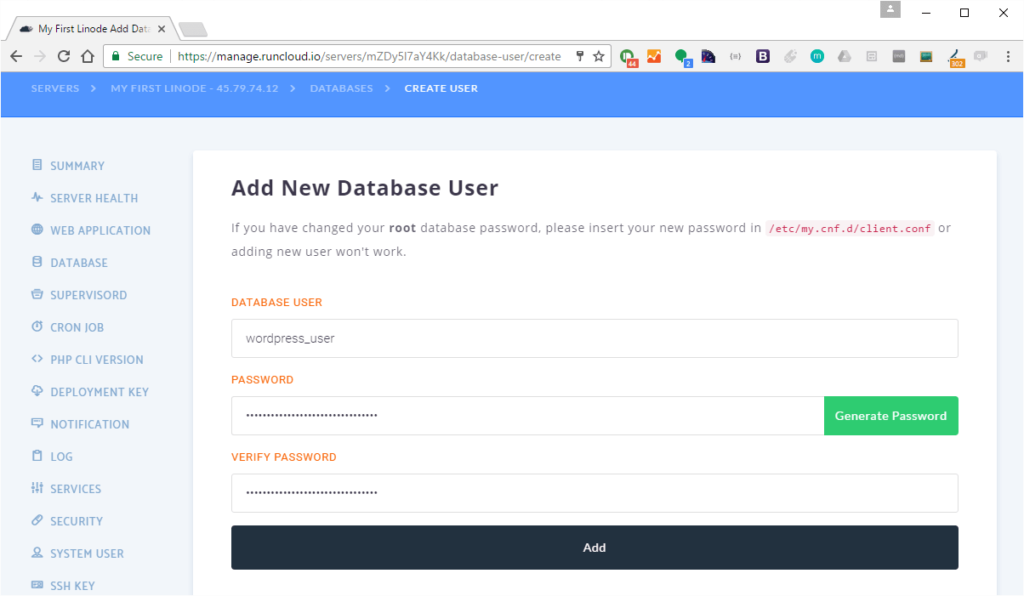
Now enter the desired username and password for this database user. You can also use the “Generate Password” option but copy and save the password created for later use.
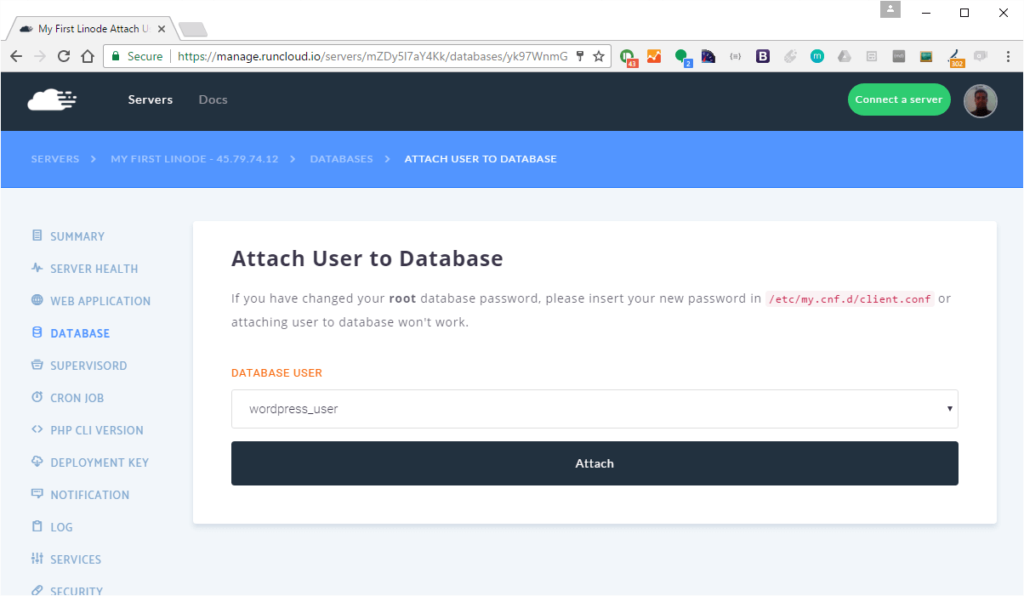
Once you have a user and a database, we need to attach the user to the database.
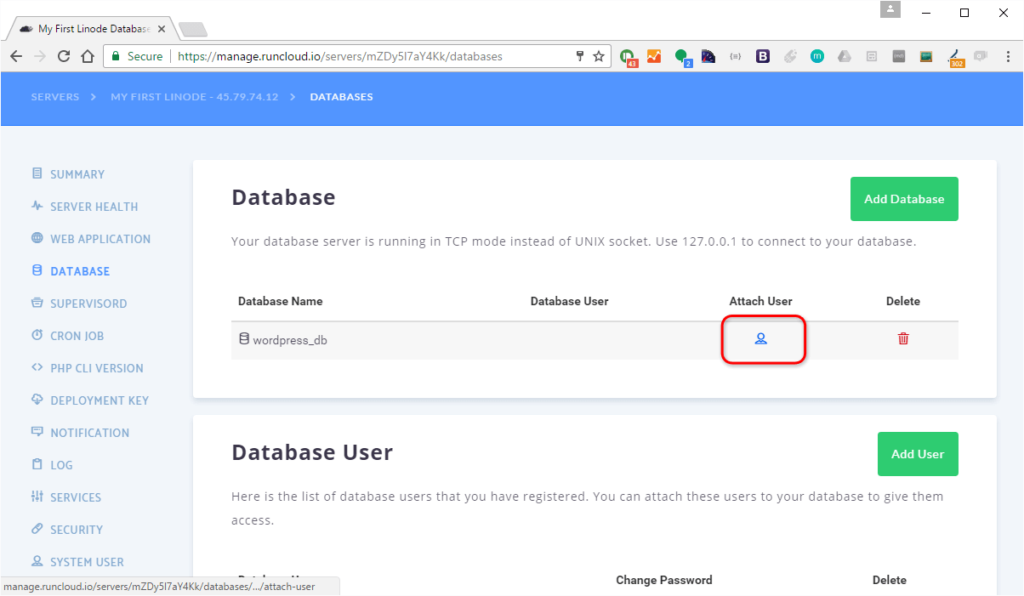
Select the database user you just created and click on the “Attach” button.
Now you should be able to see that your database has a user attached to it. We are ready to install WordPress now. Let’s continue.
Installing WordPress using RunCloud
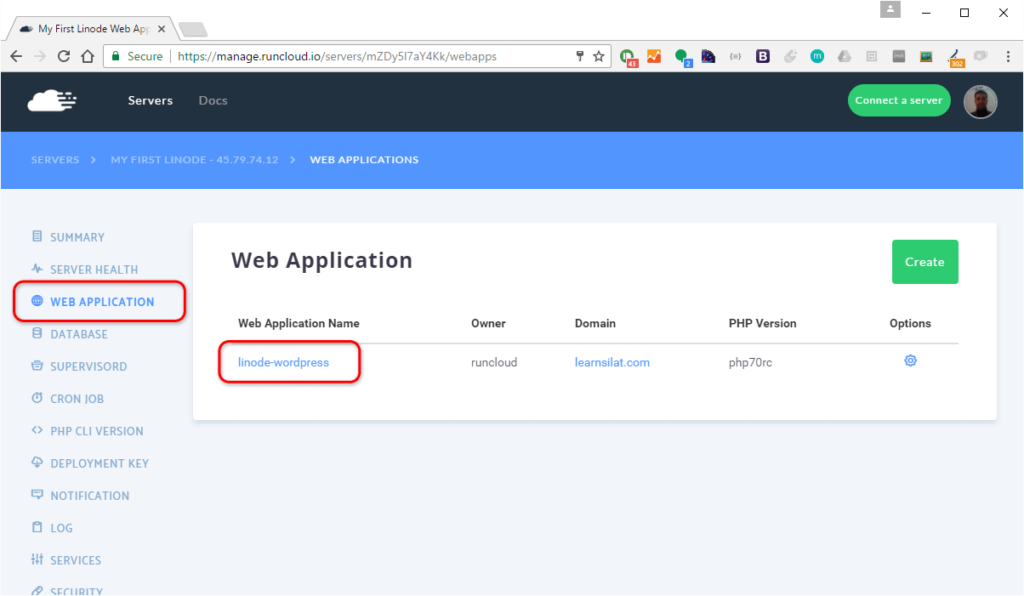
Now click on the Web Application. And then click on the Web Application that you created previously.
Now click on the “Script Installer” tab. And then select “Wordpress” from the drop down option, and then click the “Install” button.
Completing your WordPress installation
At this step, we need to go to the website. When you do so, you will be presented with the WordPress setup wizard. First choose your preferred language.
Now WordPress will remind you that you need your database configuration details. We already have that from the previous steps. Just click the “Let’s go” button. Now we can enter our database details and the database username and password.
Remember, with RunCloud.io, your database host must be “127.0.0.1” and not “localhost”. Now click the “Submit” button.
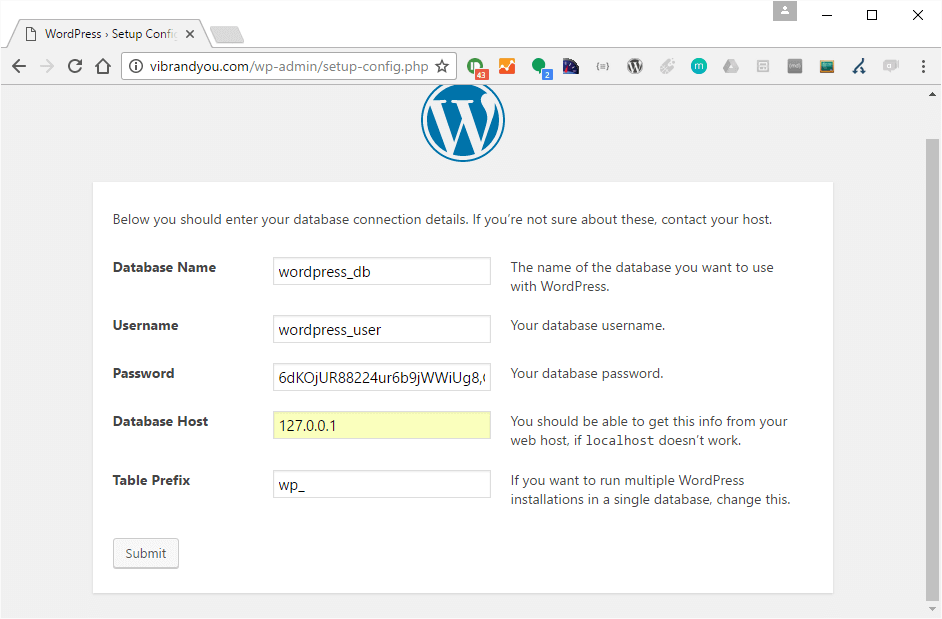
If everything is in order, you should see a message from WordPress with a button that says “Run the install”. Just click on it.
Once the installation process is complete, WordPress will present you with some basic configuration options, and also administrator account creation. I don’t recommend that you user the username “admin” for your administrator’s account. Think of something else.
When are ready, click on the “Install WordPress” button.
We should be done now.
All done!
If everything is going as expected, you should be directed to the WordPress Dashboard. You can also try the homepage to see how your website looks like now.
And your website.
Congratulations. You just installed WordPress on a Linode server, thanks to RunCloud.
Extra Note: Installing more WordPress on the same server
It doesn’t make sense to deploy a new server just so that you can install another WordPress site. That will incur extra costs with the new server that you just deployed. With RunCloud, you can always check how your server is performing. Click on “Server Health” from the side menu to find out. And perhaps you can decide whether your server can take another WordPress installation, or maybe two.
To add another WordPress site on the same server, all that you have to do is to create another Web Application using RunCloud. You can add a new domain name to it and you are all set.
Go back through the tutorial again and just repeat step 7 all the way to step 14, and you will have another WordPress site on this same server.

I use a similar tool, Cloudways hosting platform, to setup WordPress on Linode. The only difference is that I can launch Linode server directly from the platform. There is no need to create a separate account on Linode and connect it with the platform.