The SendPulse platform has a number of tools and features that can be extremely useful for marketing purposes. Some of the most important features of this software include a reporting tool, drag and drop builder, responsive email templates and a powerful A/B Testing tool. All you have to do is sign up on the official website, and you can start taking advantage of this service. It comes with a free plan so you will not have to pay anything to use it.
Those who run a small business will find that SendPulse has a lot to offer as a marketing tool. One of the unique things about this ESP is that it provides numerous ways to reach your target audience, thereby increasing your efficiency. The AI functionality of this platform is something else that many love about it. There are a lot of great features that you will want to learn about before making a final decision on whether or not to buy it.
Contents
SendPulse Email Marketing Plugin for WordPress
It is a free plugin for email marketing developed by SendPulse which makes handling complex tasks like newsletter subscription form integration and list management very easy.
In this tutorial, I will walk you through all essential steps required to install and successfully harness the real power of this plugin.
Before you start following the steps, it is necessary for you to first have an account on SendPulse platform because in step 2 you will need to enter specific details which are only available to registered users.
Step 1: Installation
Navigate to your website’s administration panel (yourdomain.com/wp-admin). Once you are in the admin area, you need to put your cursor on “Plugins” section and then click on “Add New” link.
Now search for “SendPulse Marketing” as shown in the image below.
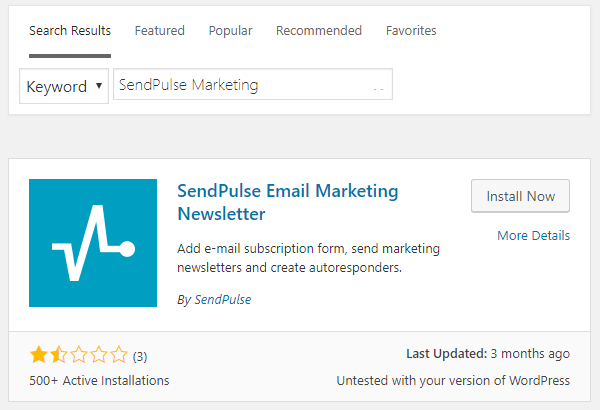
Then click on “Install” and then “Activate” button.
Step 2: Integration
You must be noticing a new option named “Sendpulse” in sidebar menu in your administration panel. Put your cursor on it and then click on “Settings” link.
Now you will be directed to a new settings page. Over here you need to enter the client ID and secret key.
Now the question is where you will get these details?
Well, I think you might remember that I requested you to create a free account. If you have not created it yet, then you can do so by clicking this link, and if you already have the account, please follow the steps listed below.
- Go to SendPulse website and log in to your account.
- Click on the Avatar (the profile image) on the top right-hand side corner.
- From the drop-down menu click on “Account Settings”.
- Click on the API tab and then click on the “Activate REST API”.
- Finally, click on the green “Save” button.
Now you should be able to see your client ID and secret key.
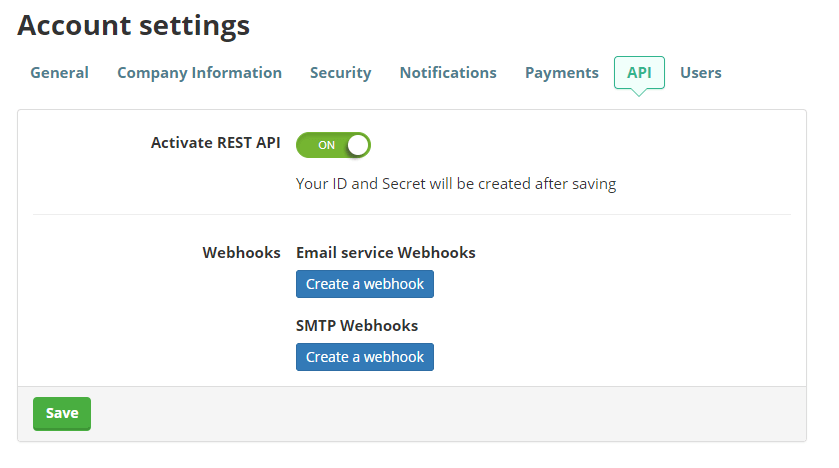
Copy the details and paste them into the appropriate sections in your plugin’s settings page and then save the changes.
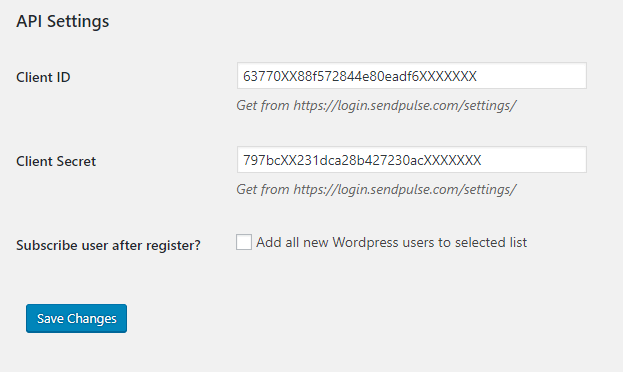
After saving the changes, the page will reload, and you will see a new option named “Address Book for new users”. By default SendPulse create a mailing list with the name “My emails”. So, unless you have created a new mailing list, the default will be select, and all your new subscribers’ details will be saved in this list.
Step 3: Creating the Form
Your next step is to create a newsletter subscription form using which your website visitors and readers will be able to subscribe to your newsletter mailing list.
In order to do so, you will have to first login to your SendPulse account. Once you have access, you control panel, try to locate “Subscription forms” in the left sidebar and then click on it.
Now click on the “Create button”.
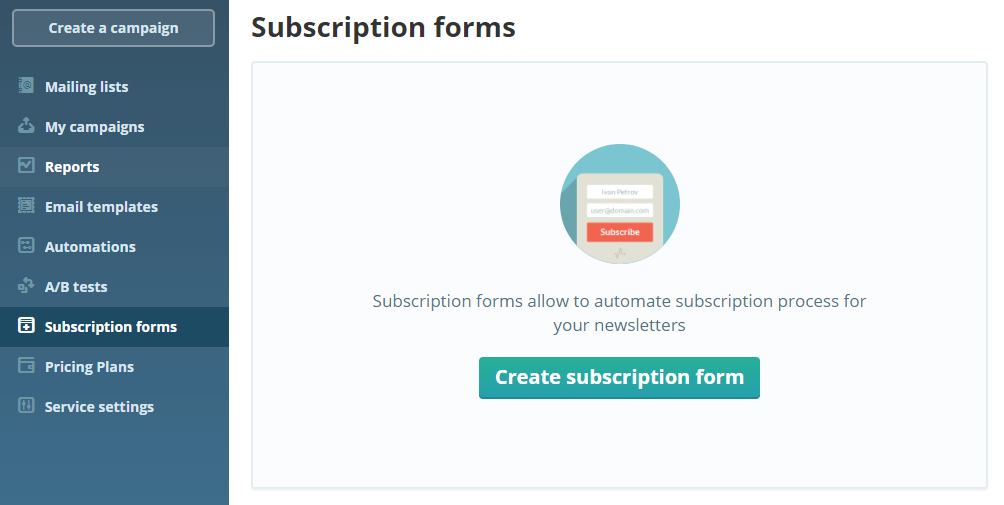
You will now be directed to a new page from where you can either select to use the pre-built templates, or you can use the builder tool to create your own custom form.
In this tutorial, I will show you how to use the form builder tool.
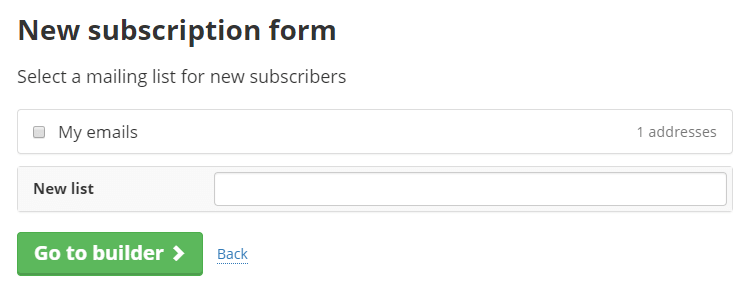
Now click on the Embedded option and then select your mailing list where you want to save all new subscribers information. In case you want to create a completely new mailing list then just give a name to your list and then click on “Go to builder” button.
You will be asked to fill in some essential details like the domain names where your newly created form will be published. Provide all details and then click on “Save and get code” button. Now a popup box will appear with few lines of codes in it. Copy it.
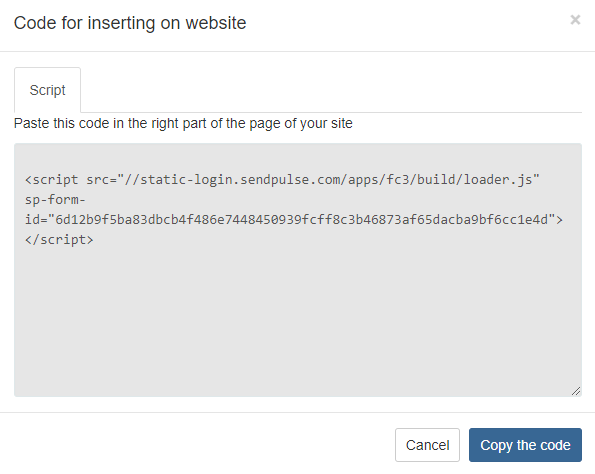
Remember that if you have subscribed to free plan, then you will not be able to remove SendPulse branding from the newsletter form. In order to remove branding, you will have to upgrade to a paid plan.
Step 4: Adding the subscription form
Go back to your wordpress website dashboard and navigate to SendPulse > Add form.
Give a name and then paste the code you are copied before into “constructor Form Code” box. Finally, click on the “Save” button and you are done.
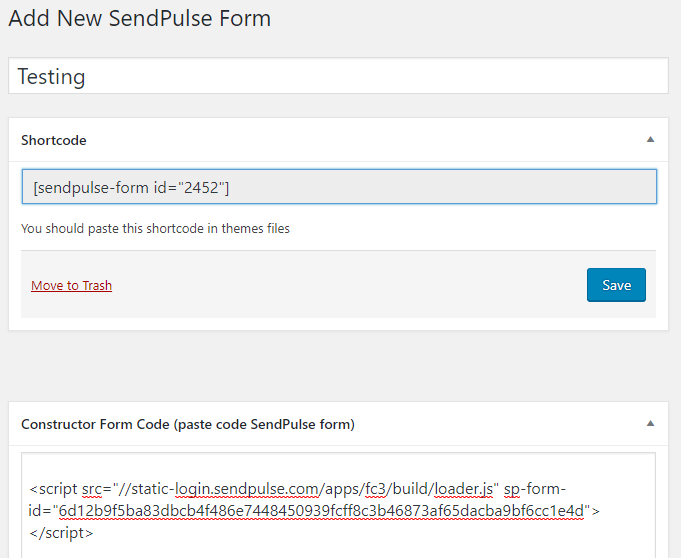
Congratulations, now you have successfully created a full functional subscription form for your website.
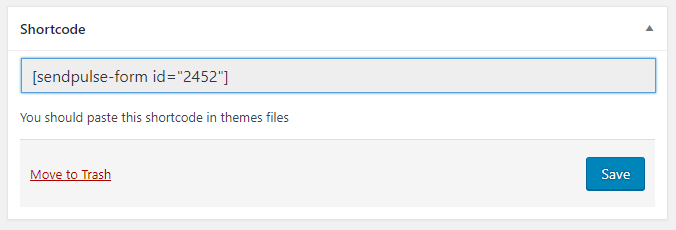
All you have to do now is to copy the shortcode as shown in the image attached above and paste it anywhere in your post, page or widget area.
Review
- Platform Features - 100%100%
- CMS Integration - 100%100%
- Plugin Features - 75%75%
- Pricing - 90%90%
- Customer Support - 100%100%
Summary
It is a powerful email marketing and automation platform offering a great set of features at a really affordable price. Comparing to Mailchimp which I have been using since 2014, SendPulse seems to have a significant advantage in terms of pricing. Furthermore, they do seem to have a great set of pre-built forms which can be further customized to suit individual needs.
Furthermore, even being a free user, you get access to each and every single feature of SendPulse platform, and that’s something which genuinely differentiates them from their competitors like AWeber or GetResponse.

Leave a Reply