Recently I have been receiving too many requests from noob (most probably) marketers on how to make subscribe button transparent. Because in all these cases you need to follow different steps. So I seriously don’t know the exact problem they are facing and so I am making few assumptions.
Since most of these requests came from bloggers and internet marketers, I am assuming that they are talking about the subscription form ( that newsletter, and offer related forms ). And so this tutorial will be based on HTML form and I will show you how to customize it using CSS.
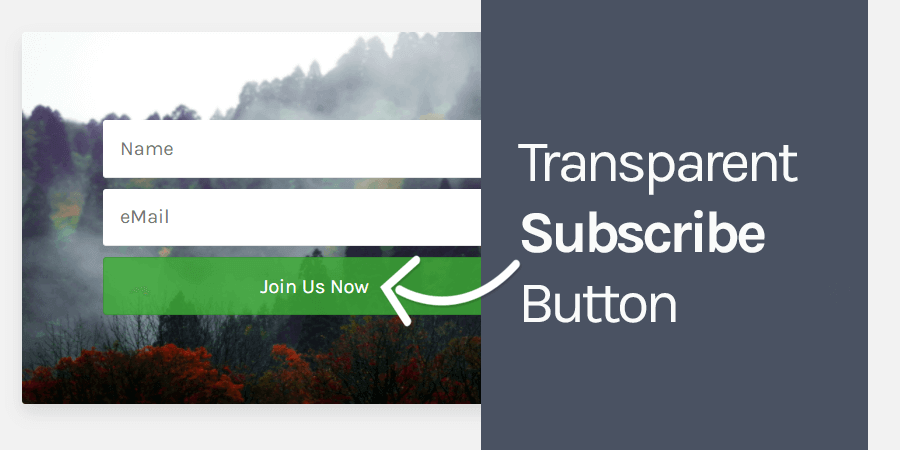
Make Subscribe Button Transparent in 2 Easy Steps
Since this guide is all about making transparent subscribe button, I haven’t focused too much on styling the form. This will help me to keep this tutorial simple and easy to explain. Hope you understand.
Tip: Before you start, I will suggest you download the complete project folder as it will help you work with my files directly.
1. Creating the HTML structure
In this form, I have added two text fields. Frist one is to accept the name and the second one is to accept the email address. Then, at last, I have added a submit button with value “Join Us Now”.
You can see the code below.
<!DOCTYPE html>
 <html>

<head>
 <title>Making the transparent subscribe buttom</title>
 <link rel="stylesheet" type="text/css" href="css/example.css">
 </head>

<body>
 <form id="tran">
 <input type="text" placeholder="Name">
 <input type="text" placeholder="eMail">
 <input type="submit" value="Join Us Now">
 </form>
 </body>

</html>
2. Styling with CSS
Now here comes the important part. This section will be divided into 2 different parts.
In the first part, I will show you the CSS code which will help to design the form. In the second part, I will show you how to make your solid color transparent.
Part 1: The complete CSS code.
I love to have a simplified file structure and thus every file is stored in their specific folder. In my project folder, this stylesheet is stored in a folder named CSS. Remember that you follow the steps and file structure or you won’t be able to load the background image properly.
@import url(https://fonts.googleapis.com/css?family=Karla);
html {
    background: #f2f2f2;
}
#tran {
    width: 450px;
    margin: 10% auto 0;
    padding: 80px 40px 80px;
    border-radius: 3px;
    box-shadow: 0 8px 25px 0px rgba(0, 0, 0, 0.1);
    background-color: #1f51d3;
    background-image: url(../img/1.jpg);
    background-size: cover;
    background-repeat: repeat;
}
#tran input[type="text"],
#tran input[type="submit"] {
    font-family: Karla;
    font-size: 18px;
    width: 85%;
    padding: 15px;
    box-sizing: border-box;
    -moz-box-sizing: border-box;
    border: none;
    -moz-border-radius: 3px;
    border-radius: 3px;
    display: block;
    float: none;
    clear: both;
}
#tran input[type="text"] {
    background: white;
    margin: 0 auto 10px;
    border-bottom: 1px solid #e5e5e5;
}
#tran input[type="text"]:focus {
    outline: none;
}
#tran input[type="submit"] {
    background: rgba(61, 172, 54, 0.81);
    color: white;
    cursor: pointer;
    border: 1px solid rgba(0, 0, 0, 0.1);
    margin: 0 auto;
}
#tran input[type="submit"]:hover {
    background: rgba(46, 146, 40, 0.81);
}
:focus::-webkit-input-placeholder,
:focus::-webkit-input-placeholder {
    text-indent: -999px
}
This is the final CSS code and it already has a transparent green color button which has color code RGBA(61, 172, 54, 0.81) .In case you want to change it or want to know how I got it, please follow the second part.
You will also notice that I have used this code background-image: url(../img/1.jpg); which basically means that your background image is stored in a folder named “img”. And this “img” folder is located inside your project folder.
Part 2: Getting the transparent RGBA color code.
I am using Google Chrome as it offers the best developer tools I have ever seen. Please kindly follow the steps closely if you want to see the simple trick to get transparent color codes.
1. Open your HTML file ( in your case the HTML form ) in Google Chrome.
2. Press “ctrl + shift + I” to open the developer tools.
3. Now bring your cursor over the subscribe button.
4. Now press “ctrl + shift + c”. and then click on that button. This will start the inspect element feature and will show the code in the developer tools as shown in the image attached below.
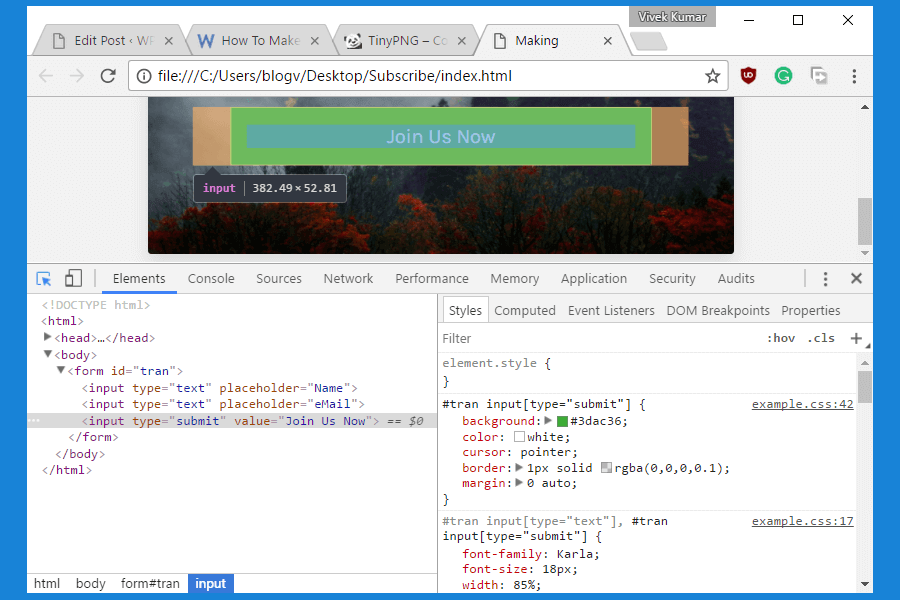
You can clearly see in the image that the color code is solid is in HEX format. in order to add transparency, please follow few more steps listed below.
5. Now you need to click on that square green box as shown in the image below. This will open up a popup color selection box from where you can choose colors and can change their format.
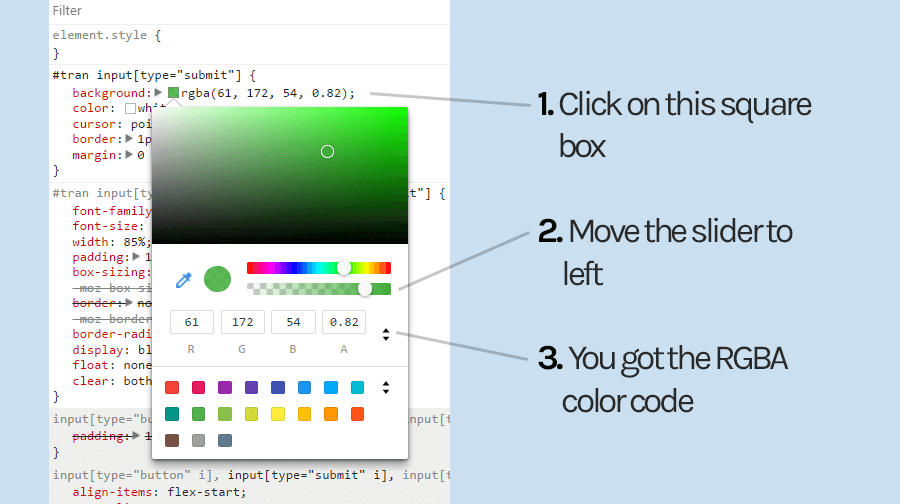
Now you need to move the green color slider to left size. As you will move it you will see the transparency effect on your subscribe button. Now finally click anywhere outside and grab the RGBA color code.
I hope this tutorial will help you achieve what you desire. In case you have any questions, please don’t hesitate to ask it in the comment section.
Thanks for this awesome tutorial. I just love the design.