Today in this guide we will discuss the various steps required to setup MaxCDN with the W3 total cache plugin. MaxCDN is now acquired by StackPath, but the steps related to the configuration with W3T Cache Plugin remains the same.
Contents
Setup MaxCDN with W3 Total Cache plugin
W3 Total cache is performance optimization plug-in which helps to create static content of your website’s dynamic pages. This plug-in comes with dozens of powerful and customizable options which allows you to configure the speed and performance of your site.
It has inbuilt caching engines for database, object and even for browsers. By default, they are assigned to specific values which according to the developer is suitable for shared hosting platform, but you have complete freedom to modify the value as per your need. This plug-in even comes with inbuilt CSS, JavaScript and HTML minify and combine capability.
Now I am not going to discuss about it in details in this post as you might get diverted from your original aim.
Step 1: Install the plugin
Your very first step is to install this cache plugin to your website. You can either install it through your administration panel, or you can manually upload the plugin into your wp-content folder using FTP.
Once you complete this process, don’t make any changes to any of the values of this plugin.
Step 2: Sign up for maxcdn account
Your second step is to sign up for maxcdn service. I will personally suggest you sign up for the annual plan as it will give you two months extra service for free of cost. Actually, if you calculate, then the monthly subscription will cost you more if you are planning to use this service for a more extended period.
But if you already have an account with them then you have to just log in to your control panel.
Step 3: Create a pull zone for your website
Now its time to create a pull zone. After visiting your dashboard, on the top navigation, you will find a link named zones. Click on this link and on the next page click on “create pull zone” button.
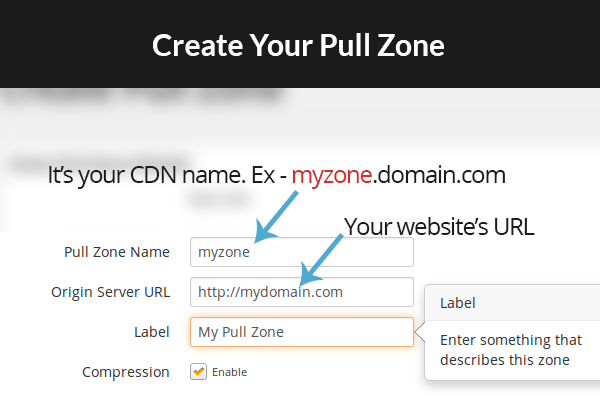
Now you will be directed to a page where you will have to enter all the details required to create a new CDN for your website. You can check the image which I have attached below for better guidance.
In the pull zone name, you will have to enter a word which is of at least three letters and make sure all of them are in small cap. Then you will have to come your website’s or blog’s domain name into the origin server URL field. Make sure to attach “HTTP://” along with your domain name or you will get an error. Now, in the label field, you can enter anything which describes your CDN. Over here you will also get the option to select compression. If you want, then you can enable gzip compression or else not.
Finally, you have to click on “create button,” and within less than 3 minutes your CDN will be ready for use.
Step 4: Create custom cdn name
From the top navigation click on pull zone and then click on the settings tab. On this page, you will find custom domain settings where you can set up your cdn name.
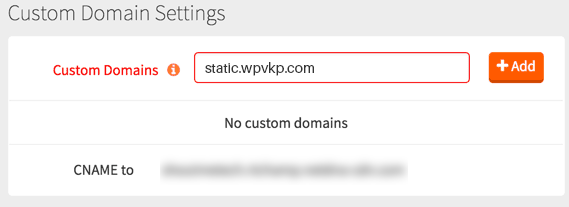
Since you have added a custom name, you will have to modify your DNS settings. Read the step listed below in order to complete the setup.
Step 5: Properly setup your pull zone
So now you have successfully created your custom pull zone. Now it’s time to properly optimize it.
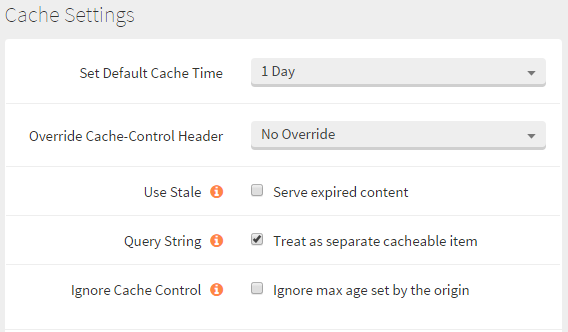
In the above image, you can see that I have set the default cache time for one day. The settings shown in the picture attached above is excellent for a dynamic website with lots of dynamic CSS changes. For example, if you are an online magazine website then you might be having custom homepage sections where you might be displaying latest content update or reviews on latest gadgets. All these content sections need to be updated on a regular basis and almost everytime you need to redesign them to make it look cool to your readers. So the settings shown in the image will be perfect.
If you have a simple blogging website where you share tips and tutorials, then you just need to change the cache time to 1 month. In this way, you will also get a higher cache hit rate, and your website’s page load performance will be really great all across the globe.
Step 6: Setup CNAME for your wordpress site
So now your CDN is ready, but you will have to create a CNAME so that your website’s contents like javascript files, style sheets, and images can be loaded from maxcdn server. In order to do so, you will have to visit your hosting account.
For this step, I am considering that you have a cPanel host management. So now login to your cPanel administration area and navigate to “simple DNS zone editor”.
Click on the simple DNS editor and then you will be directed to a new page where you will find fields to input data for A record and for CNAME record. You have to enter the data into your cname field. See the image I have added below for better understanding.
In the name field just enter the CDN name like static or data, and the field will be automatically populated with the domain name. In the CNAME field, you have to input the value which you will receive from maxcdn.
Step 7: Now connect your w3 total cache plugin with maxcdn
It’s our final step, and now you have to visit your wordpress administration panel and move to the w3 total general setting page. Over here you will have first to enable CDN option and then from the CDN type select Maxcdn.
Now visit CDN option page and over here you have replaced the origin hostname with the newly created CDN. For example static.domain.com.
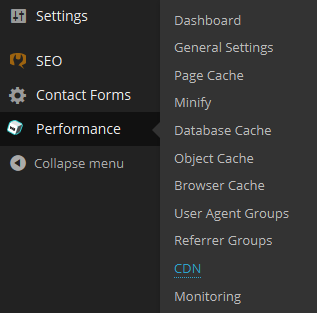
If you have created just one cname than just fill the first field. If you have multiple names, then populate other areas.

Now you have to verify your account with your wordpress blog. In order to do so, you have to click on Authorize button, and it will automatically take you to the maxcdn validation page where you will receive your validation code. Copy that code and paste it into your “Authorization key” field. Finally, click on validate button, and your account will be verified. Now you can purge your content delivery network’s cache files directly from your wordpress panel.
Once you complete the last step, you can visit your website, and you will find that all your static contents are loaded from your CDN service. You should also notice improved page speed and better conversion.

Hey, It’s James. Your tutorial is really in-depth but I am stucked to step 4. Can you please guide me. I am using hostgator as my bog’s hosting platform. But my domain name registrar is godaddy. I followed your steps and asked them to help me create a new cname. As I used content as my CDN name so I think I had to create Cname with content. I created it and then pointed it to the maxcdn’s temporary url ( as I was directed by them ). But still my static files like my images and videos are not loading from my CDN.
I think you have done everything in the correct manner but you forgot to add the CName to your hostgator’s account DNS settings.
In order complete this procedure you’ll have to visit to your hostgator’s account. Now you have to log into your cPanel and have to search for the DNS settings page. Inside the DNS setting page you will find a column for CName. In this field enter your CDN’s name along with the temporary URL provided by MaxCDN.
Finally save all your settings and reload your pages. It might take a few hours for the DNS propagation but since you have already added the CName to your registrar domain management panel, I think your settings will be effective within few seconds.
I wish this helps to you.
Thank for this interesting setup guide. I followed all your steps and now my website is loading within 1 second and all thanks goes to you.
Thank you for commenting. Keep reading.
In step 6 you asked to move to wordpress admin panel and then to enter cname in the field. I did in the same manner as you have shown in the figure but I am unable to authorize my account. Please help me to authorize maxcdn with the w3 total cache plugin.
It seems that you have entered the wrong authorization key. Please follow these steps. First login to your maxcdn account. Now from CDN page of w3 cache, click on validate button. It will automatically take you to the page created by official maxcdn team and over their, you will get your key. Copy the exact key and then validate your account. Finally, save your settings. If you still face any problem then please let me know.
Awesome tutorial, I really loved the way you explained each and every single step in detail.